Showing posts with label Mains. Show all posts

Wednesday, 15 September 2010

Oven Roasted Root Beer Barbecue Ribs with Roseanne Cash's Potato Salad

Oven Roasted Root Beer Barbecue Ribs with Roseanna Cash's Potato Salad - The Inky Kitchen

You'd think that choosing a recipe for this blog would be simple. Sometimes it is. Sometimes I just get inspiration from what's in season, a certain food craving, something mentioned in a book or film or even the weather, but at other times it can be a real toughy. This week took a little thinking, and it really brewed down to a combination of bad weather and carnivorous cravings.

So what could I make that would make me feel a little more summery? Barbecue food of course, and no-one takes it more seriously than our friends in the US. I decided to go with a US BBQ all star - ribs. Simple to get hold of I would have thought, but I thought wrong. I trawled round every butcher, every meat bearing market stall and every supermarket in Loughborough in my search for pork ribs, but to no avail. I found a solitary vacuumed package in a supermarket, but they weren't in a rack and looked pretty meatless.

Oven Roasted Root Beer Barbecue Ribs with Roseanna Cash's Potato Salad - The Inky Kitchen

And then once again, as happens quite often, mum came to the rescue. While complaining to her over the phone about my ribless search she had the bright idea of asking her butcher who definitely came through with the goods! She lives in Shepshed, a village on the outskirts of Loughborough. They have a wonderful butcher called G T Webster who provided me with some of the biggest racks of 'king ribs' that I had ever seen. Truly huge. I asked for two racks of 8 as I was expecting them to be no more than five inches tall. What I actually received were two racks of 6 that were more like two slabs of pork with a bit of bone in them! Wonderful!

I would definitely recommend this butcher, they are located in Shepshed Market Place (LE12 9RT). Whenever we go to my parents' for a barbecue they always have some lovely treats purchased from Webster's - sausages and pieces of chicken to grill along and sometimes some strips of belly pork. If you're in the area and are of meat eating tendencies do check them out!

Oven Roasted Root Beer Barbecue Ribs with Roseanna Cash's Potato Salad - The Inky Kitchen
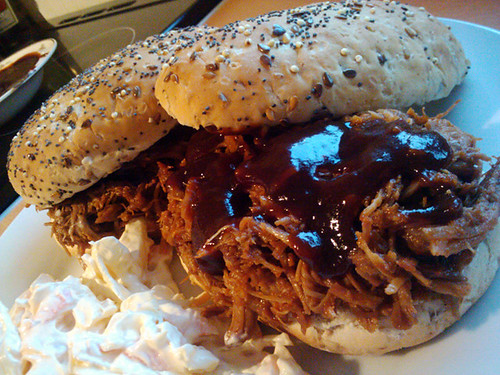
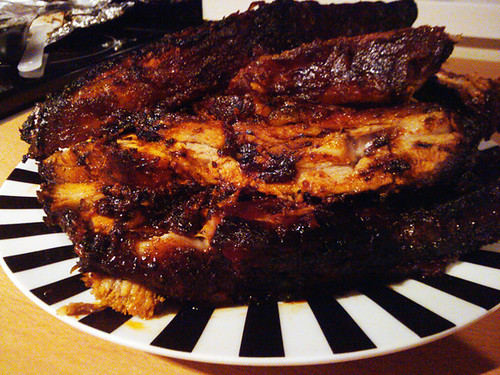
In order to keep the meat as tender as possible you really need to cook it low and slow and covered over in foil so all the steam and flavour is sealed in. Some of the bones actually fell out of the ribs as I was cooking them, so you can see it is possible to get super tender meat using just your oven! The basting of the sauce onto the ribs at high heat is also very important, it caramelises with the pork fat and you get those delicious nearly black burnished parts that melt in your mouth.... Dreamy.

And to clarify, this potato salad recipe is not my own, it is from Roseanne Cash, Johnny Cash's daughter and musician in her own right. I think this has become my favourite cold potato dish now, I love love love anything will dill in it, and it's all the better as it slightly affiliated with Johnny Cash, the man in black whose music I love so dearly. I think it's only fitting that I put on the American Recordings while typing this out...

Oven Roasted Root Beer Barbecue Ribs with Roseanna Cash's Potato Salad - The Inky Kitchen

Oven Roasted Root Beer Barbecue Ribs with Roseanne Cash's Potato Salad
Serves 4 (with lots of potato salad!)

Root Beer Barbecue Ribs Ingredients
2 x 1kg racks of pork ribs

Dry Rub Ingredients
1 tbsp light muscovado sugar
1 tbsp smoked paprika
1 tbsp garlic granules
1 tsp dried thyme
1/2 tsp ground cumin
1/2 tsp ground ginger

Root Beer Barbecue Sauce Ingredients
1 red onion, chopped into quarters
3 cloves of garlic, bruised with the back of your knife

1 x 330ml can root beer
2 tbsp cider vinegar
1 x 24g can tomato puree
1 tbsp maggi seasoning
1 tbsp worcester sauce
1 tbsp lemon juice
1 tbsp smoked paprika
1 tbsp light muscovado sugar
1 tsp garlic granules
1/2 tsp cayenne pepper
1/2 tsp ground ginger
1/2 tsp salt
1/2 tsp white pepper

Root Beer Barbecue Ribs Method
Preheat the oven to 100 C / 225 F.

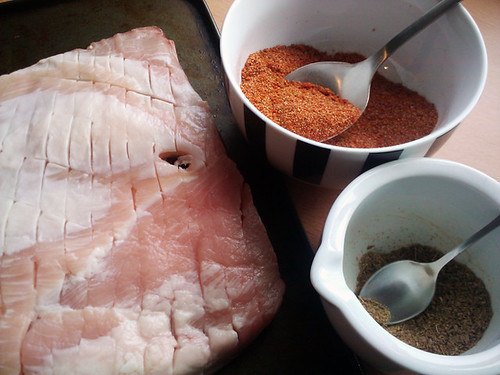
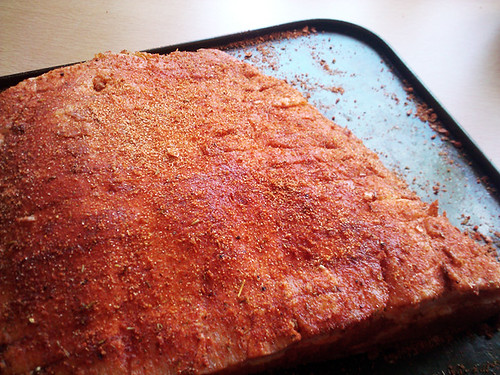
Mix together the spice rub ingredients and set to one side while you pat down your pork ribs with some kitchen roll to make sure they are nice and dry. Now take the spice rub and massage it into both sides of the racks making sure they are completely covered, even on the sides. Cover with cling film and put into the refrigerator for a few hours for the flavour to sink in - I left mine for about two hours, with the last half hour out of the fridge so it could come to room temperature before cooking.

Place the matured ribs onto a baking tray(s) and cover completely with foil, then cook in the preheated oven for four hours. While the meat is cooking make your barbecue sauce ready for basting after the four hours are up.

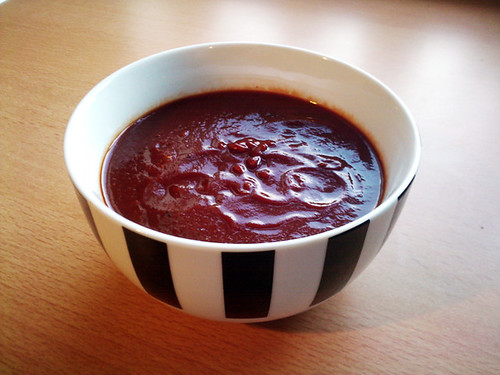
Root Beer Barbecue Sauce Method
Place the onion and garlic cloves into a non-stick saucepan and cook over medium heat until they slightly brown, then add the rest of the sauce ingredients starting with the liquids. Bring up to the boil, then lower the heat slightly and simmer with a lid on for about half an hour, stirring occasionally until you get a nice sauce consistency.

Remove from the heat and take out the onion and garlic cloves. There are not needed so just throw them away and leave the sauce to cool until the ribs are ready.

Root Beer Barbecue Ribs Method Continued
After the four hours are up, take the ribs out of the oven and remove the foil, then turn the oven heat up to 200 C / 400 F.

Next take some of the barbecue sauce and spread it evenly over the ribs, don't use it all as you want to do this basting method another two times. When both racks are nicely coated put them back into the hotter oven and cook for 10 minutes before removing and repeating the basting. Put back into the oven for another 10 minutes and then baste again, this time cooking for a further 15 minutes.

Take the racks out of the oven
- they should be burnished but still a bit sticky. Let cool for a little while before cutting into individual ribs and serving (with lots of napkins).

Roseanne Cash's Potato Salad
(Slightly adapted from Smitten Kitchen)
Serves about 8 people, so you may want to halve the recipe

Potato Salad Ingredients
1 kg red skinned potatoes, cut into roughly 1.5 inch chunks
6 pickled cucumber sticks, roughly chopped
3 sticks of celery, chopped
1 small red onion, chopped small
4 eggs, hard boiled and roughly chopped
200g mayonnaise
1 tbsp dijon mustard
1.5 tbsp cider vinegar
2 tbsp dill, finely chopped
salt and pepper to taste

Potato Salad Method
Boil the potato in salted water until tender but not falling apart - about ten minutes - then drain and place in a large bowl. Allow to cool for ten minutes before adding all the other ingredients and mixing well but triyng not to break up the potatoes too much. .

Cover with cling film and leave to stand for an hour so the flavours can develop. Serve with the barbecue ribs and enjoy a taste of a gone too soon Summer!

Oven Roasted Root Beer Barbecue Ribs with Roseanna Cash's Potato Salad - The Inky Kitchen

Notes
I apologise that there is only one photo of the ribs and the potato salad, I appear to have chosen two recipes that are exceedingly difficult to photograph.

The potato salad recipe makes enough for at least 8 people whereas the ribs will serve 4, so you can either halve the recipe or refrigerate the leftovers to eat the next day like I did.

Full fat mayo tastes the best in the salad, but you can use light - the dill and mustard still give it lots of flavour. Please don't use extra light, that stuff tastes like jellied egg whites and has an awful texture.

Because I am slightly ridiculous, I didn't think the ribs and potato salad alone would be enough food so I also grilled us some lovely locally grown corn cobs on my George Foreman. I got them from Loughborough market and they were amazing but unnecessary!

Oven Roasted Root Beer Barbecue Ribs with Roseanna Cash's Potato Salad - The Inky Kitchen

Monday, 6 September 2010

Creamy Chicken and Fennel with Handmade Garlic Roasted Gnocchi

Creamy Chicken and Fennel with Handmade Garlic Roasted Gnocchi - The Inky Kitchen

Fennel is a new obsession of mine, although to be honest I am yet to do anything more adventurous with it than roast it or use it in this very recipe. I love love love the fresh aniseedy taste, such an unusual flavour for a savoury dish but such a wonderful one that I have loved since first trying it back in February on Pete and I's first anniversary. It is that meal that this dish is loosely based around - a chicken breast stuffed with a mushroom duxelle and wrapped in parma ham, served with roasted sweet potatoes and a creamy white wine and fennel sauce.

We had gone to dinner at a Loughborough restaurant called Browns Lane which I have been going to under it's several different names for about the last ten years. It has always been amazing, and I suggest if you live in Charnwood you check it out one lunch or dinner time. I think it is very reasonably priced for the quality of food you are served and the decor is nice and simple, the eating area being on the first floor while there is a bar (that serves lovely cocktails) on the ground. I like it so much that as I have organised my work's Christmas party this year I have arranged for it to be there. This festive season will most definately be full of deliciousness!

Creamy Chicken and Fennel with Handmade Garlic Roasted Gnocchi - The Inky Kitchen

Back to this recipe however, I am aware that quite a lot of people don't like fennel. If this is the case in your household then either replace it with just 50g of finely chopped celery or leave it out altogether. It will still taste heavenly. I'm pretty sure you'd have to try very hard to make garlic, cream and chicken taste bad. I'd like to think my recipes are more like blueprints for you to amend as you please - that's the real joy of cooking after all.

The little potatoey 'dumplings' are fab with this dish, soaking up the velvety sauce and acting like tiny little garlic breads! I know it seems like a lot of work to make the gnocchi them from scratch but it's not hard at all. Two ingredients! That's all! And a little kneading never hurt anyone, or gentle fork squashing! But I suppose if you really don't want to do it you could just use the store bought variety, just make your own next time OK?


Creamy Chicken and Fennel with Handmade Garlic Roasted Gnocchi - The Inky Kitchen

Creamy Chicken and Fennel with Handmade Garlic Roasted Gnocchi
Serves 2 greedy, or 3 less greedy people as a main course

Garlic Roasted Gnocchi Ingredients
500g waxy potatoes, peeled and cut into roughly 2 inch chunks
200g good quality plain flour, preferably Italian 00
3/4 tsp salt
3/4 tsp black pepper
2 fairly big cloves of garlic, crushed
2 tbsp olive oil

Creamy Chicken and Fennel Ingredients
1 tbsp olive oil
1 large red onion, sliced into short thin lengths
100g fennel, sliced into short thin lengths
10 fresh sage leaves
2 large chicken breasts, cut into fairly small chunks
3 tbsp white wine
1 chicken stock cube
70g chestnut mushrooms, cut into fairly small chunks
150ml double cream

Garlic Roasted Gnocchi Method
Preheat the oven to 200 C / 400 F.

Place the potatoes into a large pot of boiling water and cook until just tender - when you push a knife into one you want it to go in with very little give and for the potato to not fall apart - this took ten minutes for me. Remove from the heat and drain well, then either push through a potato ricer or mash until very very smooth - lumps will be very apparent in the gnocchi.

Leave them to cool for a few minutes and then add the flour, salt and pepper and mix together. When it is combined place it on to a floured surface and knead for a few minutes until it has come together well and has a more dough like consistency. Next divide the ball into four and roll each one into a long sausage shape that is about 2cm thick, before cutting into 2.5cm lengths and pressing a fork gently into each one to create four indents. Set these aside in a bowl while you bring a large pan of salty water to the boil.

Boil the gnocchi in batches being careful not to overcrowd the pan so they don't stick together. The gnocchi are cooked when they float to the surface of the water. Remove them from the pan and let dry out a little on some kitchen towel. When they have all been boiled and dried off place them in a deep sided baking tray and pour over the olive oil and crushed garlic, then mix gently so as not to break them up and put them in the oven to cook while you make the cremay chicken. They will take anywhere between 20-30 minutes depending on your oven heat - you want them golden and crispy, it helps to give them a stir every ten minutes or so.


Creamy Chicken and Fennel Method
Heat the olive oil in a large deep frying pan and then cook off the onion and fennel for a few minutes until they become slightly translucent, then add the sage leaves and cook for a further 3-4 minutes.

Next add the diced chicken and cook until it is coloured all over and no more raw pink meat is visible before adding the white wine and crumbling over the stock cube. Give everything a good stir and then add the chopped mushrooms. Let them soften for a minute or so before stirring them in and cooking for another 7 or 8 minutes until the chicken is cooked through - check by cutting a piece in half and making sure it is white all the way through. Now pour over the double cream and raise the heat slightly, cooking for another 5-10 minutes while stirring frequently so the sauce thickens a bit.

By now the gnocchi should be roasted so plate it up, then pour over the lovely creamy chicken concoction and enjoy!

Creamy Chicken and Fennel with Handmade Garlic Roasted Gnocchi - The Inky Kitchen

Notes
I used red Rooster potatoes for this recipe as they are pretty waxy and have a lovely flavour. They're currently my favourite spud!

I think this recipe would also work really well with pork chunks instead of the chicken. Pork and sage is a great combination. Adding a little apple to the sauce would be lovely too I think.

Once again, I would not condone eating this regularly - so much starch and cream is really not good for you, but once in a while in moderation I'd say it's alright to treat yourself to something delicious and calorific! It's a very rich dish too, so I don't think I could eat it regularly if I tried!!!

Creamy Chicken and Fennel with Handmade Garlic Roasted Gnocchi - The Inky Kitchen


Monday, 23 August 2010

Moussaka Burgers with Fried Aubergine Slices and Tzatzkiki

Moussaka Burgers with Fried Aubergine Slices and Tzatzkiki

Burgers are pure genius, we all know this. Whether it be a juicy beef patty topped with bacon and cheese or a gorgeous fat veggie burger stacked with onion rings they can be perfectly tailored to anyone's taste. And I really do quite often choose the vegetarian option over the meat, a local Loughborough restaurant called Moomba's do a killer smoked aubergine and chickpea burger with halloumi - bliss!

But as good as a burger can be, I have far too often been disappointed by a greasy, grey, burnt to a crisp beef disc at many a barbecue. At the top of the list of burger fails for me is the minted lamb burger. Don't get me wrong, if this is made from scratch it can be beautiful but the pre-packed ones just never ever get it right... so I had to do something about it.

Moussaka Burgers with Fried Aubergine Slices and Tzatzkiki

As you all know by now I am not the type of lady to do it simply, so rather than just put the mint into the patty itself I have put it in a sauce and fused two of my favourite dishes together to create what I concider one of the best burgers I have ever eaten - the moussaka burger. Seasoning the mince with cinnamon, parmesan, oregano and a little chilli and topping it with a tower of fried aubergine slices, then finishing with a cool slather of homemade cucumbery tzatziki creates pure burger perfection. The only thing missing is the bechamel, which I think would be far too bland as a burger sauce.

Although the fried aubergine slices may make it a little more difficult to serve as a barbecue dish you could always prepare them inside while the lamb burgers are being grilled and bring them out with the tzatziki. It just means you'll be indoors for a few minutes and therefore closer to the fridge full of drinkies and this isn't a bad thing, surely?


Moussaka Burgers with Fried Aubergine Slices and Tzatzkiki

Moussaka Burgers with Fried Aubergine Slices and Tzatzkiki
Serves 4

Moussaka Burger Ingredients
800g fresh minced lamb
2 tsp dried oregano
1/2 tsp ground cinnamon
1 tsp dried chilli flakes (optional)
2 tbsp grated parmesan
1/2 tsp salt
1/2 tsp ground pepper
4 ciabatta bread rolls
1 or 2 ripe beef tomatoes, sliced

Fried Aubergine Slice Ingredients
1 medium aubergine, cut into cm thick slices
lots of salt
100g plain flour

Tzatziki Ingredients
200g greek yoghurt
1/2 cucumber, deseeded and either diced very small or grated
1 clove garlic, crushed
2 tbsp fresh mint, finely chopped
1 tbsp lemon juice
1/2 tsp smoked paprika

Method
Start your barbecue/grill/oven preheating to medium. Take your aubergine slices and lay them on a few sheets of paper towel, then sprinkle liberally with salt on both sides. Put these to one side while you prepare the burger patties.

Put the minced lamb into a bowl, sprinkle over all the herbs and spices and mix thoroughly with your hands. No-one wants to hit a big spice pocket in their burger so make sure everything is really well combined. Divide the mixture into four equal size balls and shape them into nice round patties, making a little indentation into the middle of each one - this stops the center bulging up and making the top bun topple off. Cover the four burgers with cling film and set aside in the fridge.

Next take your aubergine slices and press them into the flour, coating both sides and tapping off any excess. Place them back on to the paper towels and leave to settle while you make the tzatziki by combining the yoghurt with the diced cucumber, crushed garlic, mint, lemon juice and paprika. Cover with cling film and put into the fridge to develop it's flavour.

Pour olive oil into a heavy based saucepan until it is around half a cm deep and put on the hob to heat up until the oil starts to shimmer and smoke a little. Take your aubergine slices, dredge again with the flour and tap off the excess and then place in the hot oil to fry. They need 1-2 minutes on each side until they get a crispy golden coating. You'll need to do this in batches, when they are done remove them back on to the paper towels to remove any excess oil.

Cook your patties on one side of the grill and lightly toast the buns on the other. The burgers will take between 2-4 minutes on each side depending how thick you have made them. Basically, you want an even colour throughout and for the juices to run clear when poked.

Lay a few tomato slices on the bottom half of the bun, top with the lamb burger and slather over some tzatziki. Add a few slices of fried aubergine and the top half of the ciabatta roll and serve with some roasted new potatoes and a few salads of your choice - I recommend some sort of lemon and coriander cous cous concoction.

Moussaka Burgers with Fried Aubergine Slices and Tzatzkiki

Sunday, 8 August 2010

Garlic and Lemon Thyme Roasted Chicken and Purple Sprouting Broccoli Calzone

Garlic and Lemon Thyme Roasted Chicken and Purple Sprouting Broccoli Calzone

I'm fussy when it comes to pizza. I need a thin crust and good quality toppings, thick doughy bases and too much pizza sauce with a smattering of bad quality mozzarella are not to my liking. We need a good pizza place here ASAP, Loughborough is home to far too many lame take-out dives serving foam based doner kebab topped abominations. But we shall leave such disgusting thoughts behind us and move on to the good stuff...

I find vegetarian toppings much more to my liking on pizzas, lots of light elements rather than strong spicy meats so you can taste each ingredient as well as a light well thrown base. Don't worry, I'm not asking you to throw your pizza bases for this recipe, I'm pretty sure if I had tried we would have ended up with a cat running around the flat in a ghost-like costume made of dough. Never a good thing.

What is a good thing however, is the whole premise of a pasty style pizza. A crisp outer shell with a softer inner edge that gives way to a generous pile of cheesy tomatoey goodness. In this recipe I have used chicken and broccoli, purple stemmed broccoli to be exact - lots of subtle flavours that you make sing with a wonderful herb combination of lemon thyme and oregano. Roasting the chicken and broccoli is also a great flavour intensifier and removes the extra moisture which would produce the awful result of a soggy calzone.

You will get either two very large or four medium calzones from this recipe. Pete and I shared one large calzone and I would suggest serving it with a sharply lemon and oil dressed salad and a smile.

Garlic and Lemon Thyme Roasted Chicken and Purple Sprouting Broccoli Calzone

Garlic and Lemon Thyme Roasted Chicken and Purple Sprouting Broccoli Calzone
Serves 4

Pizza Dough Ingredients
325ml water, luke warm
2 tbsp olive oil
1/2 tbsp caster sugar, preferably golden
1 x 7g sachet of dried yeast
500g strong white bread flour, plus extra for dusting
1/2 tsp salt, finely ground

Creamy Ricotta Pizza Sauce Ingredients
1 tbsp olive oil
2 medium red onions, diced small
2 tsp dried oregano
6 medium-large vine ripened tomatoes, diced small
200g ricotta cheese (one standard size pot)

Filling Ingredients
170g pancetta, diced very small
2 tbsp olive oil
200g purple sprouting broccoli, cut into 1-2 inch pieces
500g chicken breast, cut into 1.5 inch chunks
4 cloves of garlic, roughly chopped
3 tbsp lemon thyme leaves, freshly pulled from the sprigs
3 tbsp parmesan, finely grated
300g mozzarella, grated

Pizza Dough Method
In a jug or bowl mix the water, olive oil, sugar and yeast well and set to one side for a few minutes to 'come alive' while you place the sifted flour into a bowl and make a well in the centre. Pour the yeasty mixture into the well and stir together with a fork gradually incorporating the flour. When it starts to come together place the dough onto a clean and floured surface and knead it until you have a springy, smooth dough - this should only take a minute or so. Place this into a floured bowl, sprinkle the top of the dough ball with more flour and cover with a damp clean tea towel. Set this aside in a warmish place to rise for about an hour, it will pretty much double in size.

Pizza Sauce Method
Preheat the oven to 200 C / 400 F.

Heat the olive oil in a deep non stick pan and add the diced onions. Cook for 2-3 minutes and then sprinkle over the dried oregano. Cook for another 2-3 minutes, add the diced tomatoes and stir well. Cook on medium high heat for about 10 minutes until the tomatoes have melted down into mush and you have a fairly thick sauce. Turn off the heat and leave to cool for 5 minutes before mixing in the ricotta cheese. Leave this off the heat to cool while you roast your fillings.

Filling Method
Place all the ingredients into a roasting tray and mix around so everything is coated with the oil, then cook in the preheated oven for 20 minutes, stirring halfway through the cooking time.

Remove from the oven and leave to cool for ten minutes. Pour onto a chopping board and dice everything down into roughly 1cm chunks, cover and leave to cool completely.

Building The Calzone
Remove your risen dough from it's bowl and knead again on a clean floured surface. Give it some welly and punch it about a bit this time to get the elasticity going, then cut into either two or four chunks depending on how many calzone you are making.

Roll the chunks of dough out into rough circles that are about half a cm thick. Place one onto a baking sheet and slather it with a good layer of the creamy tomato sauce. Sprinkle over some of the parmesan and then pile up some of your filling covering only one half of the base. Cover that with a good layer of grated mozzarella and then fold the non-topped side over the top of the fillings and press down around the edges to seal it closed.

Repeat until you have all your calzones made and then bake in the still preheated oven for 20-25 minutes until they are crispy and just starting to go golden. If you have any of the sauce left, heat it up gently in a pan and serve alongside the calzones to dip your crispy crust edges into.

Garlic and Lemon Thyme Roasted Chicken and Purple Sprouting Broccoli Calzone

Notes
Please do use purple sprouting broccoli if you can get it, it has a more pronounced flavour and less water content than the bog standard green stuff.

The creamy tomato and ricotta sauce in this recipe is a good staple to have in your repertoire - use it as a sauce for pasta, pour it over chicken breasts and top with cheese and breadcrumbs before baking or even use it cold in a sandwich as an extra spreading of delicious moisture.

I know it seems like a lot of effort, but homemade pizzas are always so much better than any take away or premade thing you could buy. Even if you only make them once a year as a treat you should give these babies a go.

Sunday, 13 June 2010

Slow Cooker Pulled Pork with Spicey Honey Rum Barbecue Sauce

Slow Cooker Pulled Pork - The Inky Kitchen

I love Southern American cooking and music and barbecue is one of the quintessential southern tastes, they take it to almost fanatical lengths with many hugely popular barbecue competitions and restaurants across the country. Over here in the UK we seem to be lacking them - I have heard of one London based place but that's about it, so to get my fix I have to do it home made. Having no garden makes this a little difficult but lately I've seen several recipes floating around for indoor cooked bbq style food.

One recipe I have seen a lot of but never actually tried is pulled pork - slow cooked pork butt/shoulder that becomes so tender you can literally ease it into shreds with two forks. This is usually made in a smoker on the barbecue but can be done in a slow cooker to great effect - I confess I don't actually own one, I've never seen a slow cooker recipe I've ever wanted to make before, so I borrowed one from Pete's mum.

Slow Cooker Pulled Pork - The Inky Kitchen

The pork came out beautifully, I had a 1.5kg piece of pork shoulder which I but into three and cooked for 5 hours on high. When the timer went I grabbed two forks and tried to pull out a piece but it literally fell apart as I tried - perfectly succulent and tender! I probably could have squeezed another 1.5kg in the slow cooker I had, but then I recon the cooking time would have been 8 or 9 hours at least. My piece made enough pork to fill 8 bread rolls generously - I could only manage to eat one roll it was so filling!

This would be really great to have as part of a bbq buffet, and as you do it in the slow cooker it doesn't take up any more room on the grill. It is sure to impress, especially with homemade honey rum barbecue sauce - I think I'm going to have to bottle up a supply so we never have to buy any again!


Served up in some tasty seeded buns with a good dollop of creamy coleslaw this is a perfect meal - remember to put out a bowl of extra sauce, people are sure to want some! (It's great on chips!)

Smoked Paprika and Honey Rum

Slow Cooker Pulled Pork with Spicey Honey Rum Barbecue Sauce
Makes 8 generously filled rolls

Pulled Pork Ingredients
1.5kg pork shoulder/butt

25g dark muscovado sugar
2 tbsp maldon salt
3/4 tbsp garlic granules
1/2 tbsp ground black pepper
1 heaped tsp smoked paprika
1 tsp dried oregano
1 tsp cayenne pepper
1 tsp coarse grain mustard
1/2 tsp worcestershire sauce
1/2 tsp maggi liquid seasoning / liquid smoke
1/4 cup red wine vinegar
1/4 cup cider vinegar

2 medium onions, sliced into think rings
2 cloves of garlic, roughly chopped

Spicey Honey Rum Barbecue Sauce Ingredients
250ml honey rum
250ml tomato ketchup (low sugar if possible)
60g dark muscovado sugar
60ml cider vinegar
1 tbsp lemon juice
1 tbsp balsamic vinegar
1 tbsp light soy sauce
1 tbsp dark soy sauce
1 tbsp maggi liquid seasoning
1 tbsp worcestershire sauce
60ml full fat coca cola
1 tbsp tomato puree
1 tsp english mustard
1 tsp smoked paprika
1/2 tsp cayenne pepper
3 cloves of garlic, minced
20g butter
salt and pepper

Pulled Pork Method

THE NIGHT BEFORE
Cut the pork shoulder into three roughly equal sized pieces and place into a strong ziplock food bag. Mix all the ingredients except the onion and garlic cloves in a bowl and then pour into the bag with the meat. Seal the bag and squish it around a bit so everything gets nicely coated, then place in the fridge to marinate overnight.

ON THE DAY OF SERVING
Remove the marinating pork from the fridge and set to one side. Chop the onions and garlic cloves and place in the bottom of the slow cooker followed by the pieces of pork. Next pour over the marinade from the ziplock bag and place on the slow cookers lid.

Cook on high power for 5 hours, then remove the pieces of meat to a plate or tray and shred with two forks - if the meat does not shred easily it will need more cooking so place it back into the slow cooker for another hour and try shredding again.

Discard the liquid and onions (you do not need these) and place the pork back into the turned off slow cooker until serving time.

Barbecue Sauce Method
Place all ingredients into a saucepan (preferably non-stick) and mix well. Simmer over a medium to low heat for 20-25 minutes until the sauce has thickened, remove and throw away the pieces of onion, and place in a bowl or bottle until needed.

Once simmered down and thickened I had around 400ml of sauce.

To Serve
Pour two thirds of the barbecue sauce over the shredded pork and mix until it is all coated. If needed, cook on medium for a further 15 minutes until heated through.

Place a generous mound of meat into a seeded roll and serve with some good quality creamy coleslaw and a pickle on the side.

Slow Cooker Pulled Pork - The Inky Kitchen

Notes
This recipe is great value as it will feed about 8 people with a piece of meat that costs around £5.00.

We were given our honey rum as a gift last time Pete's parents went on holiday but I have seen it in several off licenses and a few supermarkets. Any nice sweet spirit will do - bourbons are always good in barbecue and I think a dark rum would work well too.

Maggi liquid seasoning is available in many supermarkets in the world foods section, it is a little bottle with a bright yellow lable so you shouldn't miss it.

If you want to save time, you can use a store bought barbecue sauce - we like the Jack Daniels range that you can buy in most supermarkets.


Triple Chocolate and Mocha Cupcakes - Nancy's Sweet Treat Boutique

And this is just a photo of some cupcakes I made for Pete to take in to his colleagues at work. The ones with the red chocolate hearts are triple chocolate and the others are double chocolate mocha.

Sunday, 23 May 2010

Chorizo Risotto Stuffed Squid with Garlic and Cayenne Roasted Harlequin Squash

Squid Stuffed With Chorizo Risotto and Cayenne Roasted Harlequin Squash

As we have had such amazing weather this weekend I only thought it right for todays recipe to include grilling. Unfortunately however we now live in a flat with no balcony or garden so barbecues are out but we have a Foreman grill so I've just used that.

Seafood is always something I associate with summer, especially squid as it's something you usually eat on holiday. I remember walking through Spetses when I was younger with my parents and seeing rows and rows of squid and octopus - ofcourse then I thought that was disgusting but now it conjurs up thoughts of calamari and octopus salad and lots of other delicious dishes!

Chorizo Risotto

The little tubes can be pretty fiddly to fill if they are too small - I ordered the squid with our online shopping order so didn't get to pick which tubes I wanted and consequently got the smallest ones I've ever seen! Stuffing them sure was a task, but worth it. Like I said they were the smallest I've ever seen, the size I usually get would be much easier to fill.

This was also the first time I have tried harlequin squash. I've always eyed them up in the supermarket, bright orange and speckled and striped with green, but seem to end up getting the butternut variety, mainly as it's one of Pete's favourites. This time though I picked up a few, they seem to be the same density as butternut but smell just like pumpkin with the ubiquitus seeds and string to remove before cooking. The skin was harder to peel also, I ended up hacking it off with a knife rather than a peeler!

Squid Stuffed With Chorizo Risotto

Garlic and Cayenne Roasted Harlequin Squash
Serves 2

Ingredients
600g harlequin squash
2 large cloves of garlic, roughly chopped
3 tbsp olive oil
pinch of salt
3/4 tsp cayenne pepper


Method
Preheat the oven to 170 C / 335 F.

Peel the squash, remove the seeds and stringy innards and then but into slices about 1cm wide. Spread over a deep sided baking tray, strew over the chopped garlic, then sprinkle over the oil, salt and cayenne pepper.

Roast for half an hour, tossing halfway through.


*******

Chorizo Risotto Stuffed Squid
Serves 2

Ingredients
2 tbsp olive oil
50g chorizo sausage, diced very small
1 small red onion, diced very small
1 medium clove garlic, finely chopped
6 medium cleaned squid, tentacles diced small
50g arborio rice
2-3 tbsp flat leaf parsley, finely chopped
300ml boiling water - infused with a little saffron if you have it


Method
Fry off the onions, garlic and chorizo in the olive oil for about 3 minutes until the onions are soft and the chorizo has let go some of it's fat. Add the arborio rice, parsley and diced tentacles and fry for a further 3 minutes before adding a quarter of the boiling water. Turn the heat to medium and cook until the water has soaked into the rice. Repeat this step three more times with a quarter of the water each time.

After this taste the rice, it should now be softened. If not, repeat the above steps with 75ml water each time until the rice is cooked through. Remove from the hob and leave to cool for 15 minutes.

Take a clean squid tube and using a teaspoon stuff them with the cooled risotto up to around 1cm from the top of the tube. Take a cocktail stick and push it through the top of the tube at the open end as shown in the pictures above and below to stop the risotto from spilling out.

Grill on a barbecue, indoor grill or grill pan for 3-5 minutes on each side depending on the size of your squid. Don't overcook or you will get very rubbery results!

Serve with the roasted squash and a lemony vinaigretted
salad.

Squid Stuffed With Chorizo Risotto

Is it just me or do they look like strange little slug/bull hybrids? Just me? Ok...

Squid Stuffed With Chorizo Risotto and Cayenne Roasted Harlequin Squash

Pete said this was one of his favourite dinners yet, so I suggest you all try it soon!

Thursday, 20 May 2010

Chicken and Chorizo Stew

Chicken and Chorizo Stew - The Inky Kitchen

So obviously, I like to cook. It relaxes me, makes me feel accomplished when I come up with new recipes and improvements to existing recipes... and then you get to eat. Eating is good. Yes.

But sometimes after a long day at work, I'll get home and think 'Bleugh... I really can't be bothered to cook tonight'. Now I'm not saying that I never buy ready meals, as I am usually on some form of diet I do get low fat frozen meals but they never taste great and they have all those nasty little additives and preservatives and colourings in that we could all definitely do without. So the solution to this? Make your own ready meals!

This is quite a big thing around the blog community at the minute, there are lots of OAMC (Once A Month Cooking) recipes and planning tools popping up all over the place. I'm not that dedicated to the cause, most nights I do like to get home and potter about in the kitchen cooking up dinner listening to some good tunes or one of my many, many, MANY Vincent Price radio recordings. However, I know a lot of people have much harder jobs than I and spending one day cooking up a months worth of meals that will save hours for the rest of the month will be very appealing to them, so here is a recipe to add to the plan.

Chicken and Chorizo Stew - The Inky Kitchen

Chicken and Chorizo Stew
Makes around six 250g portions

Ingredients
2 tbsp olive oil
300g onions, cut into fairly large chunks
3 medium cloves of garlic, roughly chopped
225g chorizo sausage
400g mixed coloured peppers, cut into around 1" chunks
800g chicken, cut into around 1.5" chunks
Large pinch of Maldon salt
1/2 tsp white pepper
1/2 tsp cayenne pepper
1 tsp smoked paprika
150ml single cream
1 chicken stock cube
400ml boiling water
2 tbsp cornflour

Large soup/stew pot or casserole dish
Six foil food containers with card lids
Permanent marker

Method
Fry the onion and garlic in the olive oil on a medium heat until soft and then add the chorizo and cook for a further five minutes - the chorizo will release its fat and tint the onion a lovely orange colour.

Tip in the mixed peppers and fry for another five minutes, then add the chicken and cook until the chicken is coloured all over. Season with the salt, white pepper, cayenne and smoked paprika and let cook for ten minutes stirring quite often before adding the cream and mixing thoroughly.

Dissolve the stock cube in the boiling water and add to the pot, stir well and turn the heat down to medium low. When the pot comes to a strong simmer stir again and leave to cook through for 30 minutes. You want there to be a good amount of liquid left and it will seem quite watery - you now stir in 2 tbsp cornflour to thicken the sauce, mixing well so you don't get any lumps.

When combined, take off the heat and leave to cool for half an hour. Decant the stew into the food containers and mark on them the date that it will be in one month - this is your use by date.

Leave to cool completely and then freeze. To reheat straight from frozen place the container on a baking tray and cook at 160 C / 320 F for 45 minutes. Serve over rice or pasta or for a more special meal with some cheesy roasted potatoes.

Chicken and Chorizo Stew - The Inky Kitchen

Notes
I get my foil containers from Wilkos, they come in packs of ten for about a pound.

If you don't like spice, just leave out the cayenne pepper - the smoked paprika doesn't add heat, just a smoky sweet flavour that emphasises the chorizo really well.

This could easily be made vegetarian - I think replacing the chicken with mushrooms, aubergine pieces, tofu or sweet potato would work wonderfully.

The meats could also be changed, pork should work well as would a fairly firm fleshed fish such as monkfish or even some nice big prawns.

Please don't forget to write the use by date on the containers, we don't want anyone getting ill from eating a nice dish of year old zombified stew!!!