Monday 26 July 2010

Nancy's Best Macaroni and Cheese

Nancy's Best Macaroni and Cheese - The Inky Kitchen

After a work week like last week, I really needed a big plate full of comfort food. Being left to cover three peoples jobs is definitely not fun, and definitely not something I will be repeating after this second week of it is over. Part of me wishes that food didn't make me feel better - I would be a hell of a lot slimmer if it didn't - but sadly I don't earn enough to go on shopping sprees to lift my spirits. Until I win the lottery, I will soothe my soul with delicious but not so nutricious dinners.

This recipe is by far one of the best comforting meals I can think of and involves three of the archetypal warm you up from the inside ingredients - cheese, cream and pasta. Not for the weight watching (or the faint hearted some may say), this oven baked pot of starchy goodness was apparently made popular in the Western world by Thomas Jefferson who brought it back to Virginia, USA after his adventures in Italy, the land of wheaty cheesy goodness. Pasta? Pizza? Cannolis? Boy does that country know how to eat.

Nancy's Best Macaroni and Cheese - The Inky Kitchen
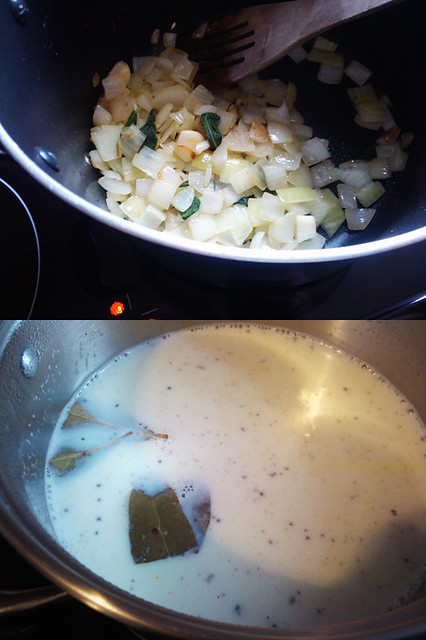
Onions cooking with garlic and sage / Milk infusing with bay leaf and nutmeg


So you can imagine my surprise when Pete let slip that he had NEVER EATEN MACARONI CHEESE? What? Is that possible? Not even the crappy boxed stuff or lame pre-packed ready meals? Of course I had to make him try it, and start with the best version possible - baptism by fire I say. My guy is a big time cheese lover, and emmental is one of his favourites so I added that to my recipe and it was a really good choice adding a slightly sharper edge to the rich creamy sauce.

Nancy's Best Macaroni and Cheese - The Inky Kitchen
Cooking roux / Finished white sauce

You could really use any cheese combination you like, but I wouldn't advise using any more mozzarella than I have here - I think if you upped the amount below it would be too stringy to mix thoroughly through the macaroni and onions. As you can see below my sauce was very elastic but still viscous enough to coat everything well. A sprinkling of parmesan over the top would add another layer of sharpness to cut through the cream.

Nancy's Best Macaroni and Cheese - The Inky Kitchen
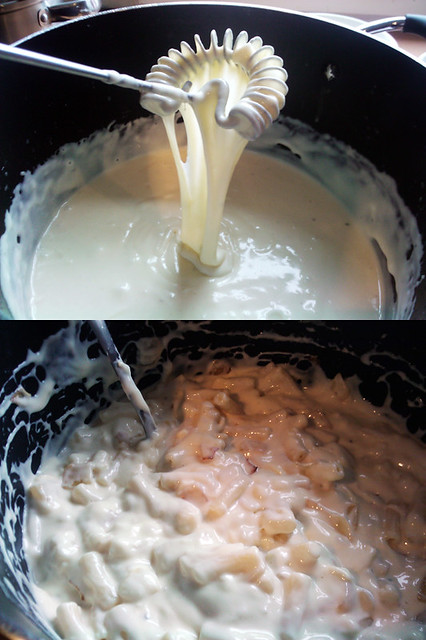
Finished cheese sauce / Macaroni, onions and sauce mixed to perfection

Do try to get panko for the topping too, it really is far better than regular breadcrumbs and gives a beautiful crunch to the burnished exterior.

I really would not advise this as a regular meal, one serving probably contains a whole days worth of calories and fat and I don't want to be held responsible for the first death by cheese clogged artories...


Nancy's Best Macaroni and Cheese - The Inky Kitchen
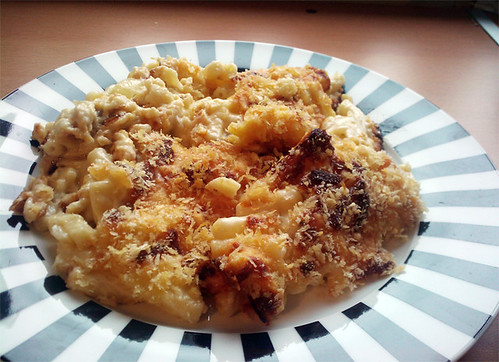
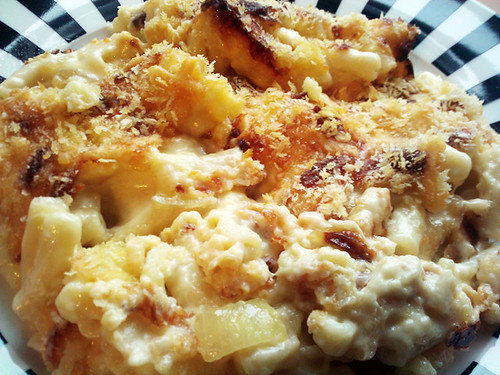
Just going into the oven / Just out of the oven

Nancy's Best Macaroni and Cheese
Makes 8 servings - this can be halved or the leftovers can be frozen after they have cooled for up to 1 month

Ingredients
1 tbsp olive oil
1 large white onion, diced
5-6 sage leaves, torn in half
1 large garlic clove, cut in two
500ml milk
2 bay leaves
pinch of nutmeg
30g plain flour
pinch of salt
pinch of ground black pepper
250g grated mozzarella
250g grated mature cheddar
200g grated emmental
250g macaroni
2 cups panko (or regular) breadcrumbs

Method
Preheat the oven to 190 C / 375 F and butter either 2 medium or 1 large deep sided oven pan. Put these to one side out of your way.

Fry the diced onion, garlic halves and torn sage over medium heat until they are soft and caramelised. Remove the garlic halves and sage leaves and set aside - this can be done in advance and refrigerated if needed.

Warm the milk over low heat with the broken bay leaves and nutmeg until it comes to a simmer, then turn off the heat and remove the bay leaves . Melt the butter in another deep sided pan over medium heat and when it starts to bubble mix in the flour, salt and pepper, then cook for 1 minute. Whisk in the hot milk in 4 parts - it may seize up at first but keep whisking and when all the milk is added you should have a smooth sauce. Keep cooking this mixture, stirring often, until it bubbles and thickens - this should take around 10-12 minutes. While this is cooking put the pasta on to boil for aroudn 8 minutes - you want it to be al dente as it will soften more in the oven.

Take the pan off the heat and thoroughly mix in the cheeses, leaving a little of each to use as topping, and set aside. Drain your al dente macaroni and rinse it in cold water to get most the starch off. Add to the cheese sauce with the onions you cooked earlier and stir through so everything is well combined.

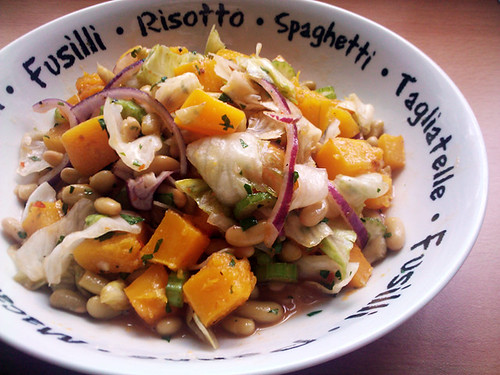
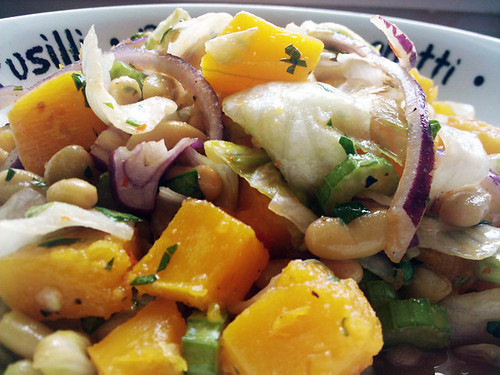
Pour into the buttered oven pan(s) and top with the remaining cheese and a good layer of panko breadcrumbs. Put into the oven and bake for 30-45 minutes until the tops are golden, bubbling and crispy. Serve alongside salad with a balsamic and olive oil dressing and eat your way to high calorie heaven.

Nancy's Best Macaroni and Cheese - The Inky Kitchen

Sunday 18 July 2010

Sweetcorn and Red Onion Fritters

Sweetcorn and Red Onion Fritters - The Inky Kitchen

I must apologise for my lack of prose recently. I have had a very busy and muddled mind for the last few weeks which I put down to trying to do far more things than I am actually capable of. That last one has been a downfall of mine for years. I find it very very difficult to let people do things for me, this usually ends up with me being rushed off my feet suffering from a stress induced throat infection and then having a minor panic attack at/on/to Pete. Thankfully he now understands my crazy, or so I like to think, and knows that within a few minutes I will again be fine and smiling. Hugs are all I really need, I am a lot softer than my tattooed exterior would lead you to believe.

Hopefully now that I have realised my silliness and am trying to lighten my creative load I will be able to explain my inspirations for the things I cook and blog. I don't like to just get straight on with a recipe with no notes on why it is so delicious or significant in my life. I am the same with cookery books - this is probably why I love Nigella so much - she gives little anecdotes and cooking tips before each of her recipes. Nigella forever <3

These fritters were in fact a disaster the first time I tried to make them. My batter was much too runny and they ended up with raw centres. I was cooking them far too hot, charring the outside but leaving a gooey inner. Huge fail. This time however I put a little more research and thought into the batter recipe and they worked wonderfully. Since I made them three days ago I have had no less than eight seperate cravings for them. Discs of crispy fried corny perfection is what they may from now on be know as.

Sweetcorn and Red Onion Fritters - The Inky Kitchen

Sweetcorn and Red Onion Fritters
Makes 12

Ingredients
100g self-raising flour
1/2 tsp smoked paprika
1/2 tsp chilli flakes or cayenne pepper
1/4 tsp white pepper
1/4 tsp salt
150ml milk
2 eggs, separated
2 tbsp parsley, finely chopped
250g sweetcorn kernels - I used a drained tin full
1 medium red onion, diced very small
sunflower oil for frying

Method
Place the flour, paprika, cayenne pepper, salt and white pepper into a bowl and mix together. Whisk the milk, egg yolks and parsley in a jug and pout into the flour mixture, beating until well combined.

Whisk the egg whites until they form soft peaks and then fold into the batter along with the sweetcorn kernels and diced red pepper. Leave to one side while you heat a few tablespoons of oil in a frying pan.

Fry heaped tablespoons of the mixture in batches over a medium heat for around 3-4 minutes on the first side, then flipping and cooking for a further 2-3 minutes. Place on a plate under foil and put into a low oven so they stay hot while you cook the rest of the fritters.

Serve warm with a little mayonnaise or salsa. You can freeze any leftovers for re-heating at a later date, just make sure you wrap them well in foil or plastic wrap.


Sweetcorn and Red Onion Fritters - The Inky Kitchen

Sunday 11 July 2010

Earl Grey Cupcakes with Lemon Buttercream Frosting

Earl Grey Cupcakes with Lemon Buttercream Frosting

Although I cannot say I am a big tea drinker I do quote often partake in some of it's more fragrant and floral relatives like herbals and fruit infusions, green teas and I have recently grown a liking for earl grey with a slice of lemon. Such a lovely combination, as the earl grey itself has bergamot notes which the lemon enhances wonderfully so you can imagine sitting by a swan filled pond at a stately home under a white parasol. I hope I'm not the only one who gets this excited about teas!

Concidering the images these flavours brought up for me I think they will be the perfect flavouring for some of the cupcakes I am taking to one of my best friends' wedding next Saturday. These are the test batch and I think they turned out almost perfectly. I may use less frosting next time as the delicate floral taste of the cake needs to shine through a little more! I may even make myself a batch to eat plain - did I really just say that? I'm so addicted I'm pretty sure I bleed buttercream...

I'll be taking three batches to the wedding - these earl grey babies, chocolate and salted caramel as Jon the groom loves them and a batch of my victoria sponge cupcakes - vanilla cake stuffed with jam and topped with a good swirl of creamy vanilla buttercream. I think I'm going to make some cute toppers for the salted caramel cupcakes too, Jon is an awesome artist and drew a cartoon of himself and Sarah for the invitations so I think I'll use that and maybe draw up some monograms. I'll get some photos as long as I remember this time, I've been forgetting to photograph stuff a lot recently, boo.


Earl Grey Cupcakes with Lemon Buttercream Frosting

Earl Grey Cupcakes with Lemon Buttercream Frosting
Makes 12 standard American size cupcakes

Cupcake Ingredients
120ml semi-skimmed milk
1 earl grey teabag (or a homemade one using loose tea leaves like I made, see notes below)
120g plain flour
140g caster sugar
1 1/2 tsp baking powder
1 tsp lemon zest
1/2 tsp salt
2 tsp earl grey tea leaves, ground as fine as you can get them in a pestle and mortar with the salt
40g butter, softened
1 egg

Frosting Ingredients
125g butter, softened
1 tsp lemon zest
2 tbsp fresh lemon juice
500g icing sugar
a few drops of yellow food colouring (optional)

Cupcakes Method
Preheat the oven to 170 C / 325 F and line a muffin tray with 12 standard American size cupcake liners. Set aside.

Slowly heat the milk in a small saucepan until just to the boil, then remove from the heat and add the earl grey teabag. Leave to infuse for 5 minutes then remove, squeezing what you can from the teabag, and leave to cool completely.

Mix the flour, sugar, baking powder, lemon zest, ground tea leaves and salt, add the butter and beat for 2-3 minutes until it reaches a sandy consistency.

Whisk the egg into the cooled tea infused milk and then slowly add to the dry ingredients mixing until well combined, scrape down the sides of the bowl with a spatula and then mix again for a further 2-3 minutes until it has thickened slightly.

Divide the mixture between the cupcake cases and bake for 20-25 minutes, turning halfway through, until the cake tops have gone slightly golden and spring back when pressed lightly. Leave to cool in the tray for ten minutes, then remove and leave to completely cool before frosting.

Frosting Method
Beat the softened butter with the lemon zest and juice until combined and then add the icing sugar in 3-4 batches, making sure each is mixed in well before adding the next. After all the sugar is combined add your few drops of colouring and mix until blended.

Frost the cooled cupcakes with either a piping bag and nozzle or a spatula or knife and then decorate as you wish.

Earl Grey Cupcakes

Notes
As I was using loose tea leaves I made my own taebag for infusing the milk. Just cut the top from a standard tea bag, empty all the leaves into the bin and then fill with 1 tsp of earl grey leaves. Fold over the top and sew closed with white cotton - you could just staple it down as long as you knew your staples were very clean!

I used what is called a French icing tip for these cupcakes, they make tight stripes in the icing which look sharp to me like the lemon flavour.

If you can't find icing roses you could always use sugared jelly lemon slices which you can find in most supermarkets' baking section.


Earl Grey Cupcakes with Lemon Buttercream Frosting

Tuesday 6 July 2010

Sweet Chilli and Roasted Butternut Squash Salad

Sweet Chilli and Butternut Squash Salad

Ladies and gents, this has been a pretty crazy long weekend. I spent Thursday night and most of Friday baking up over 100 cupcakes to both fulfil a few orders and take to Groby Family Fun Day for my first stall with Nancy's Sweet Treat Boutique. Believe me when I say that pretty much everything in our kitchen was coated in a fine layer of icing sugar by the end of it!

The resulting evening cleaning session was really worth it though as I sold out within an hour and a half of the fair opening and got lots of interest for custom orders. It really boosted my cupcaking confidence as this was my first fair and had been pretty sure I'd be taking quite a few cakes home - I guess now I know for next time to make even more! Here are some that sold the quickest - vanilla cupcakes baked into wafer cones and frosted to look like cool tasty ice creams!

Vanilla Ice Cream Cone Cupcakes - www.sweet-treat-boutique.co.uk

Needless to say I was bushed by the time we got home after the fair and cooking was the last thing on my mind, so what did I do? ...I made meatloaf for dinner. I guess you just can't keep me out of the kitchen! Minimal cooking was done on Sunday however but by Monday morning my mind was right back in the refrigerator.

A butternut squash had been purchased and so I was trying to think of something a little different to our usual squash risotto with cashew nuts and red wine that was also healthy and relatively low in fat - it is one of my best friends' weddings on the 17th and I have a gorgeous dress that I have to look fabulous in. So what is a healthy dinner? Why salas of course! No boring cucumber and iceberg and unripe tomato disasters here though - nice hot roasted butternut squash chunks over a lettuce, bean and onion base with some sesame seeds for crunch and a dose of heat with a sweet chilli dressing (which would be fabulous over pasta too I think).

Sweet Chilli and Butternut Squash Salad

Sweet Chilli and Roasted Butternut Squash Salad
Serves 2 for a main course of 4 for a starter

Salad Ingredients
600-700g butternut squash, peeled, de-seeded and diced into 1-2cm cubes
1 clove garlic, crushed
1-2 tsp olive oil
2 little gem lettuces, sliced any way you like
half a red onion, sliced very thinly and doused with a little lemon juice
400g tin flageolet beans, drained and rinsed (265g drained weight)
1 stick of celery cut into half cm chunks
3 tbsp sesame seeds

Dressing Ingredients (this will make more than you need, you can just refridgerate the rest for up to a week)
1 tbsp olive oil
1/2 tbsp sesame oil
1 tbsp sweet chilli sauce
1 tbsp rice vinegar
1 tbsp cider vinegar
1 tbsp soy sauce
1 tbsp mirin / rice wine (optional)
1 tsp brown sugar
1 tsp salt
1 tsp freshly ground black pepper

Method
Spread the butternut squash onto a baking tray in an even layer and cover with the olive oil and crushed garlic, cook in a preheated oven on high for 25-30 minutes until softened and going slightly caramelised and crispy.

While the squash is cooking prepare all the other ingredients but the sesame seeds and divide between the two bowls. Next mix all the dressing ingredients well and pour about a quarter over each bowl of salad, then toss to coat everything.

When the squash is cooked divide it between the two salad bowls and then sprinkle over the sesame seeds.