Showing posts with label Dinner. Show all posts

Sunday, 10 July 2011

Crispy Calamari with Samphire & Ginger Aioli


I'm back I'm back I'm back! We fiiiiiiiinally got a phone line put in at our new house on Friday and so I am back with you in the online land of the living! Let's celebrate with some tasty fried food, deal?

Well it's safe to say that the last few months have been eventful to say the least - Pete, Cleo and I moved into a gorgeous Grade II listed terrace that we are all in love with. It was completely refurbished shortly before we moved in and has an adorable little private garden at the back with raised decking where I can sit barbecuing and drinking Pimms. I was a little worried as my new kitchen is quite a bit smaller than the last, but I'm coping ok - I am having to keep some of my kitchen appliances on top of the wall units but its a small sacrifice to pay to have such a lovely home.


I have also passed my driving test (first time, POW!) and properly opened my little bakery business www.sweet-treat-boutique.co.uk. It's still only in my free time from my full time job but its a start and its going really well - I am supplying the coffee shop of my local department store Tylers with my cakes and bakes as well as doing any custom orders I am receiving. But anyway, onto the food...


You can guarantee that if there is calamari on the menu I will order it. I love love love the stuff but find that I can often be disappointed at either a too heavy batter or over cooked rubbery squid. It's also not the kind of thing I'd like to cook a lot myself. Aside from the calorie content I really do hate deep frying stuff as I mentioned in my very first post - the things I do for you guys huh?

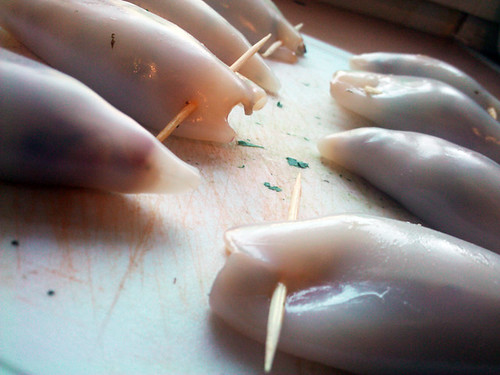
Now I buy my squid frozen in boxes from my local Chinese supermarket, but this means I have to prepare it myself as they are whole. One of the perks of this is that you get the tentacles, and they are my favourite part to eat. Preparing it yourself is a little messy and time consuming and I know some people will be too squeamish, but don't worry, you can buy cleaned squid tubes and even pre-cut squid rings from most supermarkets now. If you would like to try preparing it yourself, you can either shoot me an email via the link at the side, or just Google for instructions - there are even some videos on YouTube if you prefer to learn visually.


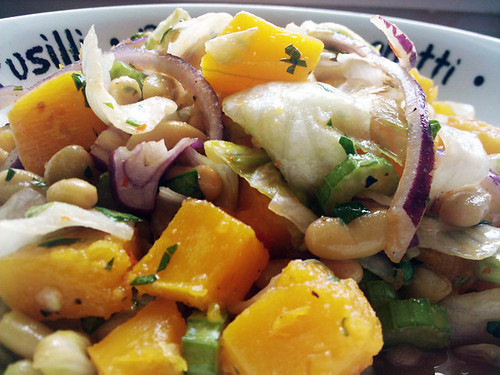
The samphire also needs a little preparation work and is now available from most fishmongers and I believe Asda now sell packets of it. I got mine from one of the stalls on Loughborough Market - a nice handful is more than you need and despite it being the new in food to eat it only cost £1.40. To prepare it all you need to do is pull off any thick roots or discoloured parts and give it a good wash with cold water. Easy. You'll probably have some leftover, so I suggest throwing it in a little potato salad or adding it to some pasta with flaked salmon, lemon juice and parmesan.

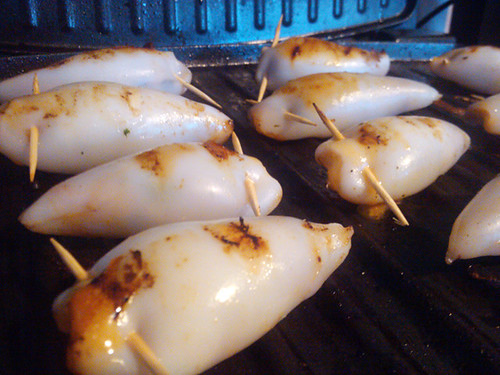
The actual deep frying itself is I admit very easy, just make sure you use a splash guard as it can be prone to spit fat when you add the squid. Don't be afraid, it is so very worth it! You want to start by preparing the aioli, so lets get straight to it...


Samphire and Ginger Aioli
Makes about 1 cup

Ingredients
1 large clove of garlic
1/2 tsp salt
1 egg yolk, from a large room temperature egg
150ml extra virgin olive oil
100ml standard olive oil
1/2 tsp ground ginger
2 tsp runny honey
1 tbsp rice vinegar
1 tbsp balsamic vinegar
25g samphire, steamed for 3-4 minutes and finely chopped

Method
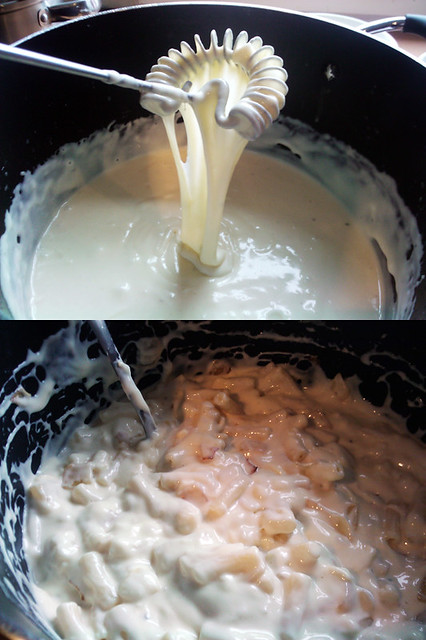
Crush the garlic clove with the salt into a paste and put into a large bowl with the egg yolk and whisk together. You now need to combine the oils and drizzle them into the egg yolk mixture very very slowly as you whisk - I did this with the whisk attachment on my KitchenAid but you could either use a food processor or do it by hand. Just make sure the oil is added slowly and in a very thin stream - you can see the technique on one of the pictures above.

Once all the oil has been added and the aioli has thickened up it's time to add the flavourings. You want to whisk in the ginger, honey and vinegars and then mix the finely chopped samphire in with a spoon. Keep the aioli covered in the refrigerator for up to 3 days.
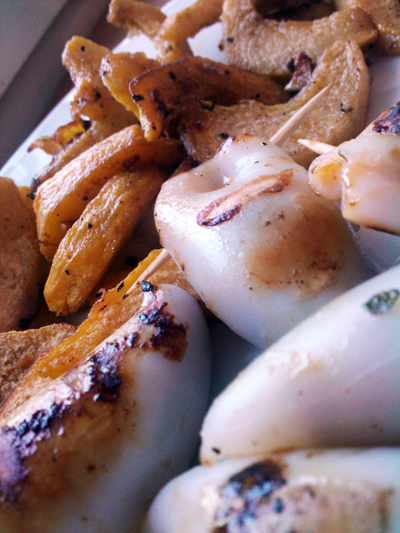
***

Calamari
Serves 2 as a main, 4 as a starter

Ingredients
500g squid rings (and tentacles if you can get them)
2 tbsp cornflour
4 tbsp fine cornmeal / semolina
1 tsp salt
1 tsp paprika
enough vegetable oil to fill your pan 1.5-2" deep

Method
Heat the oil in a medium sized saucepan over a high heat.

Put the cornfour, cornmeal, salt and paprika into a zipper top food bag and mix around before adding the squid. Zip up the bag and give it a good shake around making sure you coat all the squid.

When your oil looks like it is shimmering test that it is hot enough by adding a little pinch of flour. If it sizzles you're ready to go.

Fry the squid in batches until it reaches a crispy golden brown colour - this will only take a minute or two - and remove it to some kitchen paper to drain off any excess oil.

Serve up with the aioli and a little salad and dig in!


Sunday, 13 February 2011

Earl Grey Tea Smoked Chicken Breast

OK so I'm a little late for Chinese New Year but I wanted to get my Valentines post out last weekend so anyone that wanted to had time to make the cookies for their sweety - maybe you can make this for them for dinner and then give the cookies as dessert?

Anyway, this is a very simple recipe - don't let the whole smoking thing scare you. You need to have a window open and an extractor on if possible, and if you are making this for your hot date I would suggest smoking it earlier in the day and re-heating it wrapped in foil in the oven just before serving - then you can get changed and perfume yourself up again so you don't smell like a smokehouse.


Remember to double layer your foil and try to seal it as well as poissible so the least amount of smoke possible escapes. You could use any kind of black tea you like, I am a big Earl Grey fan so used that but I have had salmon smoked with lapsang souchong too which was very lovely. I'd like to try langoustines cooked in this method soon too.

As you can see I've served the chicken with a little salad but it's very nice over rice too with a sprinkling of sesame seeds and finely chopped nori seaweed sheet. I get these little sachets of rice seasoning from my local chinese which had sesame seeds, shreds of nori and some chicken/seafood/vegetable flavoured salt that you just mix in.


Earl Grey Tea Smoked Chicken Breast
Serves 2

Ingredients
2 chicken breasts
2 tbsp soy sauce
1 tbsp rice vinegar
1 tbsp mirin / rice wine
1 tsp five spice
2 tbsp earl grey tea leaves
3 tbsp rice (any kind)
1 tbsp sugar

You will also need a good amount of tin foil, a wok and a steamer basket that will fit inside it.

Method
Place your chicken breasts into a dish or plastic bag and pour in the soy sauce, rice vinegar, mirin and five spice. Make sure all the chicken is covered and then put in the fridge to marinate for at least one hour.

When ready to cook remove the chicken from the fridge and set to one side. Now line the bottom of your wok with a double layer of tin foil big enough to overlap the rim by a good 2 inches. Sprinkle in the tea leaves, rice and sugar and then put in the steamer basket. Now turn the hob on to high heat.

Pat the chicken breasts dry with some kitchen roll and then cut each one lengthways into two pieces. When the tea and rice starts to smoke, arrange the chicken evenly on the steamer and then cover the wok with another double layer of tin foil, rolling it in with the overlap from the bottom layer to seal in the smoke.

Cook for 12 minutes and them remove from the heat, open up and cut into one of the chicken pieces to see if it is cooked. If not, just seal the pan up again and smoke for a little longer until it is.

Slice the cooked chicken into thin pieces and serve any way you wish.


Sunday, 2 January 2011

Pistachio, Rosemary and Red Onion Pizza


Like many dishes I cook, this was inspired by a tv show. I am an avid Food Network fan, one of my favourite shows being The Best Thing I Ever Ate, wherein famous US tv chefs tell us about their favourite restaurant dishes. There was recently an episode on pizzas broadcast which included the 'Rosa' from Pizzeria Bainco in Phoenix, Arizona. It was a super thin crist topped with red onion, parmigiano reggiano, rosemary and Arizona pistachios and looked superb. Needless to say, I felt a great urge to cook it, and so I did.

I fail to see how anything could fail to be delicious and beautiful with the addition of pistachio nuts. They work so well with the red onion, and my addition of a little mozzarella adds additional creaminess and that cheesy stringiness I find so intrinsic to a good pizza.

The dough recipe I used was by (heaven forbid) Anthony Worral Thompson, and I have to admit is a very good one, but do remember that the dough has to be left for a few hours to prove and then again for a little while to rest before shaping. Also, try and get it as thin as possible and make sure to keep an eye on it while it's cooking. As there is no sauce you need to make sure you don't crisp it up too much or your pizza will be dry and the delicate flavours lost.


Pistachio, Rosemary and Red Onion Pizza
Serves 2

Pizza Dough Ingredients
175 ml water, lukewarm
1 packet (7g) active dried yeast
1 tbsp olive oil
275g strong white flour
pinch of salt

Topping Ingredients
a little extra virgin olive oil for drizzling
75g mozzarella, grated
50g parmesan cheese, grated
50g pistachio nuts, shelled and finely chopped
1-2 tsp fresh rosemary, finely chopped
1 red onion, finely sliced

Pizza Dough Method
Pour 75ml of the lukewarm water into a jug and mix in the yeast, then place in a warm place for 10 minutes (I put mine next to a radiator. Stir in the olive oil.

Put the flour and salt into a large bowl, make a well in the centre and pour in the yeast mixture. Mix until just combined and then knead together on a floured surface until you get a nice elastic dough. Oil a large bowl lightly and place the dough in it, then cover with cling film and set aside in a warm place for 1-2 hours by which time the dough should have doubled in size.

Remove from the bowl and knead again until smooth, then set aside on a tray to rest for a little while before shaping - about half an hour.

You now want to shape the dough - flatten it with your fingers onto a floured surface, then drape over your fist and gently stretch it from the outside edge. When you have got the required shape place it on an oven tray dusted lightly with semolina or flour.

Finishing The Pizza
Preheat the oven to the hottest temperature it will reach.

Drizzle a little olive oil over the pizza base, then sprinkle over the mozzarella and parmesan. Now evenly strew over the pistachio nuts and rosemary before laying on as many slices of red onion as you desire.

Bake in the preheated oven for 10-15 minutes, keeping an eye on it so it doesn't burn. You want the base to be cooked but not to scorch the nuts, cheese or onions.

Serve with a dressed salad or a bowl of good soup.


Wednesday, 15 September 2010

Oven Roasted Root Beer Barbecue Ribs with Roseanne Cash's Potato Salad

Oven Roasted Root Beer Barbecue Ribs with Roseanna Cash's Potato Salad - The Inky Kitchen

You'd think that choosing a recipe for this blog would be simple. Sometimes it is. Sometimes I just get inspiration from what's in season, a certain food craving, something mentioned in a book or film or even the weather, but at other times it can be a real toughy. This week took a little thinking, and it really brewed down to a combination of bad weather and carnivorous cravings.

So what could I make that would make me feel a little more summery? Barbecue food of course, and no-one takes it more seriously than our friends in the US. I decided to go with a US BBQ all star - ribs. Simple to get hold of I would have thought, but I thought wrong. I trawled round every butcher, every meat bearing market stall and every supermarket in Loughborough in my search for pork ribs, but to no avail. I found a solitary vacuumed package in a supermarket, but they weren't in a rack and looked pretty meatless.

Oven Roasted Root Beer Barbecue Ribs with Roseanna Cash's Potato Salad - The Inky Kitchen

And then once again, as happens quite often, mum came to the rescue. While complaining to her over the phone about my ribless search she had the bright idea of asking her butcher who definitely came through with the goods! She lives in Shepshed, a village on the outskirts of Loughborough. They have a wonderful butcher called G T Webster who provided me with some of the biggest racks of 'king ribs' that I had ever seen. Truly huge. I asked for two racks of 8 as I was expecting them to be no more than five inches tall. What I actually received were two racks of 6 that were more like two slabs of pork with a bit of bone in them! Wonderful!

I would definitely recommend this butcher, they are located in Shepshed Market Place (LE12 9RT). Whenever we go to my parents' for a barbecue they always have some lovely treats purchased from Webster's - sausages and pieces of chicken to grill along and sometimes some strips of belly pork. If you're in the area and are of meat eating tendencies do check them out!

Oven Roasted Root Beer Barbecue Ribs with Roseanna Cash's Potato Salad - The Inky Kitchen
In order to keep the meat as tender as possible you really need to cook it low and slow and covered over in foil so all the steam and flavour is sealed in. Some of the bones actually fell out of the ribs as I was cooking them, so you can see it is possible to get super tender meat using just your oven! The basting of the sauce onto the ribs at high heat is also very important, it caramelises with the pork fat and you get those delicious nearly black burnished parts that melt in your mouth.... Dreamy.

And to clarify, this potato salad recipe is not my own, it is from Roseanne Cash, Johnny Cash's daughter and musician in her own right. I think this has become my favourite cold potato dish now, I love love love anything will dill in it, and it's all the better as it slightly affiliated with Johnny Cash, the man in black whose music I love so dearly. I think it's only fitting that I put on the American Recordings while typing this out...

Oven Roasted Root Beer Barbecue Ribs with Roseanna Cash's Potato Salad - The Inky Kitchen

Oven Roasted Root Beer Barbecue Ribs with Roseanne Cash's Potato Salad
Serves 4 (with lots of potato salad!)

Root Beer Barbecue Ribs Ingredients
2 x 1kg racks of pork ribs

Dry Rub Ingredients
1 tbsp light muscovado sugar
1 tbsp smoked paprika
1 tbsp garlic granules
1 tsp dried thyme
1/2 tsp ground cumin
1/2 tsp ground ginger

Root Beer Barbecue Sauce Ingredients
1 red onion, chopped into quarters
3 cloves of garlic, bruised with the back of your knife

1 x 330ml can root beer
2 tbsp cider vinegar
1 x 24g can tomato puree
1 tbsp maggi seasoning
1 tbsp worcester sauce
1 tbsp lemon juice
1 tbsp smoked paprika
1 tbsp light muscovado sugar
1 tsp garlic granules
1/2 tsp cayenne pepper
1/2 tsp ground ginger
1/2 tsp salt
1/2 tsp white pepper

Root Beer Barbecue Ribs Method
Preheat the oven to 100 C / 225 F.

Mix together the spice rub ingredients and set to one side while you pat down your pork ribs with some kitchen roll to make sure they are nice and dry. Now take the spice rub and massage it into both sides of the racks making sure they are completely covered, even on the sides. Cover with cling film and put into the refrigerator for a few hours for the flavour to sink in - I left mine for about two hours, with the last half hour out of the fridge so it could come to room temperature before cooking.

Place the matured ribs onto a baking tray(s) and cover completely with foil, then cook in the preheated oven for four hours. While the meat is cooking make your barbecue sauce ready for basting after the four hours are up.

Root Beer Barbecue Sauce Method
Place the onion and garlic cloves into a non-stick saucepan and cook over medium heat until they slightly brown, then add the rest of the sauce ingredients starting with the liquids. Bring up to the boil, then lower the heat slightly and simmer with a lid on for about half an hour, stirring occasionally until you get a nice sauce consistency.

Remove from the heat and take out the onion and garlic cloves. There are not needed so just throw them away and leave the sauce to cool until the ribs are ready.

Root Beer Barbecue Ribs Method Continued
After the four hours are up, take the ribs out of the oven and remove the foil, then turn the oven heat up to 200 C / 400 F.

Next take some of the barbecue sauce and spread it evenly over the ribs, don't use it all as you want to do this basting method another two times. When both racks are nicely coated put them back into the hotter oven and cook for 10 minutes before removing and repeating the basting. Put back into the oven for another 10 minutes and then baste again, this time cooking for a further 15 minutes.

Take the racks out of the oven
- they should be burnished but still a bit sticky. Let cool for a little while before cutting into individual ribs and serving (with lots of napkins).

Roseanne Cash's Potato Salad
(Slightly adapted from Smitten Kitchen)
Serves about 8 people, so you may want to halve the recipe

Potato Salad Ingredients
1 kg red skinned potatoes, cut into roughly 1.5 inch chunks
6 pickled cucumber sticks, roughly chopped
3 sticks of celery, chopped
1 small red onion, chopped small
4 eggs, hard boiled and roughly chopped
200g mayonnaise
1 tbsp dijon mustard
1.5 tbsp cider vinegar
2 tbsp dill, finely chopped
salt and pepper to taste

Potato Salad Method
Boil the potato in salted water until tender but not falling apart - about ten minutes - then drain and place in a large bowl. Allow to cool for ten minutes before adding all the other ingredients and mixing well but triyng not to break up the potatoes too much. .

Cover with cling film and leave to stand for an hour so the flavours can develop. Serve with the barbecue ribs and enjoy a taste of a gone too soon Summer!

Oven Roasted Root Beer Barbecue Ribs with Roseanna Cash's Potato Salad - The Inky Kitchen

Notes
I apologise that there is only one photo of the ribs and the potato salad, I appear to have chosen two recipes that are exceedingly difficult to photograph.

The potato salad recipe makes enough for at least 8 people whereas the ribs will serve 4, so you can either halve the recipe or refrigerate the leftovers to eat the next day like I did.

Full fat mayo tastes the best in the salad, but you can use light - the dill and mustard still give it lots of flavour. Please don't use extra light, that stuff tastes like jellied egg whites and has an awful texture.

Because I am slightly ridiculous, I didn't think the ribs and potato salad alone would be enough food so I also grilled us some lovely locally grown corn cobs on my George Foreman. I got them from Loughborough market and they were amazing but unnecessary!

Oven Roasted Root Beer Barbecue Ribs with Roseanna Cash's Potato Salad - The Inky Kitchen

Monday, 6 September 2010

Creamy Chicken and Fennel with Handmade Garlic Roasted Gnocchi

Creamy Chicken and Fennel with Handmade Garlic Roasted Gnocchi - The Inky Kitchen

Fennel is a new obsession of mine, although to be honest I am yet to do anything more adventurous with it than roast it or use it in this very recipe. I love love love the fresh aniseedy taste, such an unusual flavour for a savoury dish but such a wonderful one that I have loved since first trying it back in February on Pete and I's first anniversary. It is that meal that this dish is loosely based around - a chicken breast stuffed with a mushroom duxelle and wrapped in parma ham, served with roasted sweet potatoes and a creamy white wine and fennel sauce.

We had gone to dinner at a Loughborough restaurant called Browns Lane which I have been going to under it's several different names for about the last ten years. It has always been amazing, and I suggest if you live in Charnwood you check it out one lunch or dinner time. I think it is very reasonably priced for the quality of food you are served and the decor is nice and simple, the eating area being on the first floor while there is a bar (that serves lovely cocktails) on the ground. I like it so much that as I have organised my work's Christmas party this year I have arranged for it to be there. This festive season will most definately be full of deliciousness!

Creamy Chicken and Fennel with Handmade Garlic Roasted Gnocchi - The Inky Kitchen

Back to this recipe however, I am aware that quite a lot of people don't like fennel. If this is the case in your household then either replace it with just 50g of finely chopped celery or leave it out altogether. It will still taste heavenly. I'm pretty sure you'd have to try very hard to make garlic, cream and chicken taste bad. I'd like to think my recipes are more like blueprints for you to amend as you please - that's the real joy of cooking after all.

The little potatoey 'dumplings' are fab with this dish, soaking up the velvety sauce and acting like tiny little garlic breads! I know it seems like a lot of work to make the gnocchi them from scratch but it's not hard at all. Two ingredients! That's all! And a little kneading never hurt anyone, or gentle fork squashing! But I suppose if you really don't want to do it you could just use the store bought variety, just make your own next time OK?


Creamy Chicken and Fennel with Handmade Garlic Roasted Gnocchi - The Inky Kitchen

Creamy Chicken and Fennel with Handmade Garlic Roasted Gnocchi
Serves 2 greedy, or 3 less greedy people as a main course

Garlic Roasted Gnocchi Ingredients
500g waxy potatoes, peeled and cut into roughly 2 inch chunks
200g good quality plain flour, preferably Italian 00
3/4 tsp salt
3/4 tsp black pepper
2 fairly big cloves of garlic, crushed
2 tbsp olive oil

Creamy Chicken and Fennel Ingredients
1 tbsp olive oil
1 large red onion, sliced into short thin lengths
100g fennel, sliced into short thin lengths
10 fresh sage leaves
2 large chicken breasts, cut into fairly small chunks
3 tbsp white wine
1 chicken stock cube
70g chestnut mushrooms, cut into fairly small chunks
150ml double cream

Garlic Roasted Gnocchi Method
Preheat the oven to 200 C / 400 F.

Place the potatoes into a large pot of boiling water and cook until just tender - when you push a knife into one you want it to go in with very little give and for the potato to not fall apart - this took ten minutes for me. Remove from the heat and drain well, then either push through a potato ricer or mash until very very smooth - lumps will be very apparent in the gnocchi.

Leave them to cool for a few minutes and then add the flour, salt and pepper and mix together. When it is combined place it on to a floured surface and knead for a few minutes until it has come together well and has a more dough like consistency. Next divide the ball into four and roll each one into a long sausage shape that is about 2cm thick, before cutting into 2.5cm lengths and pressing a fork gently into each one to create four indents. Set these aside in a bowl while you bring a large pan of salty water to the boil.

Boil the gnocchi in batches being careful not to overcrowd the pan so they don't stick together. The gnocchi are cooked when they float to the surface of the water. Remove them from the pan and let dry out a little on some kitchen towel. When they have all been boiled and dried off place them in a deep sided baking tray and pour over the olive oil and crushed garlic, then mix gently so as not to break them up and put them in the oven to cook while you make the cremay chicken. They will take anywhere between 20-30 minutes depending on your oven heat - you want them golden and crispy, it helps to give them a stir every ten minutes or so.


Creamy Chicken and Fennel Method
Heat the olive oil in a large deep frying pan and then cook off the onion and fennel for a few minutes until they become slightly translucent, then add the sage leaves and cook for a further 3-4 minutes.

Next add the diced chicken and cook until it is coloured all over and no more raw pink meat is visible before adding the white wine and crumbling over the stock cube. Give everything a good stir and then add the chopped mushrooms. Let them soften for a minute or so before stirring them in and cooking for another 7 or 8 minutes until the chicken is cooked through - check by cutting a piece in half and making sure it is white all the way through. Now pour over the double cream and raise the heat slightly, cooking for another 5-10 minutes while stirring frequently so the sauce thickens a bit.

By now the gnocchi should be roasted so plate it up, then pour over the lovely creamy chicken concoction and enjoy!

Creamy Chicken and Fennel with Handmade Garlic Roasted Gnocchi - The Inky Kitchen

Notes
I used red Rooster potatoes for this recipe as they are pretty waxy and have a lovely flavour. They're currently my favourite spud!

I think this recipe would also work really well with pork chunks instead of the chicken. Pork and sage is a great combination. Adding a little apple to the sauce would be lovely too I think.

Once again, I would not condone eating this regularly - so much starch and cream is really not good for you, but once in a while in moderation I'd say it's alright to treat yourself to something delicious and calorific! It's a very rich dish too, so I don't think I could eat it regularly if I tried!!!

Creamy Chicken and Fennel with Handmade Garlic Roasted Gnocchi - The Inky Kitchen


Monday, 23 August 2010

Moussaka Burgers with Fried Aubergine Slices and Tzatzkiki

Moussaka Burgers with Fried Aubergine Slices and Tzatzkiki

Burgers are pure genius, we all know this. Whether it be a juicy beef patty topped with bacon and cheese or a gorgeous fat veggie burger stacked with onion rings they can be perfectly tailored to anyone's taste. And I really do quite often choose the vegetarian option over the meat, a local Loughborough restaurant called Moomba's do a killer smoked aubergine and chickpea burger with halloumi - bliss!

But as good as a burger can be, I have far too often been disappointed by a greasy, grey, burnt to a crisp beef disc at many a barbecue. At the top of the list of burger fails for me is the minted lamb burger. Don't get me wrong, if this is made from scratch it can be beautiful but the pre-packed ones just never ever get it right... so I had to do something about it.

Moussaka Burgers with Fried Aubergine Slices and Tzatzkiki

As you all know by now I am not the type of lady to do it simply, so rather than just put the mint into the patty itself I have put it in a sauce and fused two of my favourite dishes together to create what I concider one of the best burgers I have ever eaten - the moussaka burger. Seasoning the mince with cinnamon, parmesan, oregano and a little chilli and topping it with a tower of fried aubergine slices, then finishing with a cool slather of homemade cucumbery tzatziki creates pure burger perfection. The only thing missing is the bechamel, which I think would be far too bland as a burger sauce.

Although the fried aubergine slices may make it a little more difficult to serve as a barbecue dish you could always prepare them inside while the lamb burgers are being grilled and bring them out with the tzatziki. It just means you'll be indoors for a few minutes and therefore closer to the fridge full of drinkies and this isn't a bad thing, surely?


Moussaka Burgers with Fried Aubergine Slices and Tzatzkiki

Moussaka Burgers with Fried Aubergine Slices and Tzatzkiki
Serves 4

Moussaka Burger Ingredients
800g fresh minced lamb
2 tsp dried oregano
1/2 tsp ground cinnamon
1 tsp dried chilli flakes (optional)
2 tbsp grated parmesan
1/2 tsp salt
1/2 tsp ground pepper
4 ciabatta bread rolls
1 or 2 ripe beef tomatoes, sliced

Fried Aubergine Slice Ingredients
1 medium aubergine, cut into cm thick slices
lots of salt
100g plain flour

Tzatziki Ingredients
200g greek yoghurt
1/2 cucumber, deseeded and either diced very small or grated
1 clove garlic, crushed
2 tbsp fresh mint, finely chopped
1 tbsp lemon juice
1/2 tsp smoked paprika

Method
Start your barbecue/grill/oven preheating to medium. Take your aubergine slices and lay them on a few sheets of paper towel, then sprinkle liberally with salt on both sides. Put these to one side while you prepare the burger patties.

Put the minced lamb into a bowl, sprinkle over all the herbs and spices and mix thoroughly with your hands. No-one wants to hit a big spice pocket in their burger so make sure everything is really well combined. Divide the mixture into four equal size balls and shape them into nice round patties, making a little indentation into the middle of each one - this stops the center bulging up and making the top bun topple off. Cover the four burgers with cling film and set aside in the fridge.

Next take your aubergine slices and press them into the flour, coating both sides and tapping off any excess. Place them back on to the paper towels and leave to settle while you make the tzatziki by combining the yoghurt with the diced cucumber, crushed garlic, mint, lemon juice and paprika. Cover with cling film and put into the fridge to develop it's flavour.

Pour olive oil into a heavy based saucepan until it is around half a cm deep and put on the hob to heat up until the oil starts to shimmer and smoke a little. Take your aubergine slices, dredge again with the flour and tap off the excess and then place in the hot oil to fry. They need 1-2 minutes on each side until they get a crispy golden coating. You'll need to do this in batches, when they are done remove them back on to the paper towels to remove any excess oil.

Cook your patties on one side of the grill and lightly toast the buns on the other. The burgers will take between 2-4 minutes on each side depending how thick you have made them. Basically, you want an even colour throughout and for the juices to run clear when poked.

Lay a few tomato slices on the bottom half of the bun, top with the lamb burger and slather over some tzatziki. Add a few slices of fried aubergine and the top half of the ciabatta roll and serve with some roasted new potatoes and a few salads of your choice - I recommend some sort of lemon and coriander cous cous concoction.

Moussaka Burgers with Fried Aubergine Slices and Tzatzkiki

Sunday, 8 August 2010

Garlic and Lemon Thyme Roasted Chicken and Purple Sprouting Broccoli Calzone

Garlic and Lemon Thyme Roasted Chicken and Purple Sprouting Broccoli Calzone

I'm fussy when it comes to pizza. I need a thin crust and good quality toppings, thick doughy bases and too much pizza sauce with a smattering of bad quality mozzarella are not to my liking. We need a good pizza place here ASAP, Loughborough is home to far too many lame take-out dives serving foam based doner kebab topped abominations. But we shall leave such disgusting thoughts behind us and move on to the good stuff...

I find vegetarian toppings much more to my liking on pizzas, lots of light elements rather than strong spicy meats so you can taste each ingredient as well as a light well thrown base. Don't worry, I'm not asking you to throw your pizza bases for this recipe, I'm pretty sure if I had tried we would have ended up with a cat running around the flat in a ghost-like costume made of dough. Never a good thing.

What is a good thing however, is the whole premise of a pasty style pizza. A crisp outer shell with a softer inner edge that gives way to a generous pile of cheesy tomatoey goodness. In this recipe I have used chicken and broccoli, purple stemmed broccoli to be exact - lots of subtle flavours that you make sing with a wonderful herb combination of lemon thyme and oregano. Roasting the chicken and broccoli is also a great flavour intensifier and removes the extra moisture which would produce the awful result of a soggy calzone.

You will get either two very large or four medium calzones from this recipe. Pete and I shared one large calzone and I would suggest serving it with a sharply lemon and oil dressed salad and a smile.

Garlic and Lemon Thyme Roasted Chicken and Purple Sprouting Broccoli Calzone

Garlic and Lemon Thyme Roasted Chicken and Purple Sprouting Broccoli Calzone
Serves 4

Pizza Dough Ingredients
325ml water, luke warm
2 tbsp olive oil
1/2 tbsp caster sugar, preferably golden
1 x 7g sachet of dried yeast
500g strong white bread flour, plus extra for dusting
1/2 tsp salt, finely ground

Creamy Ricotta Pizza Sauce Ingredients
1 tbsp olive oil
2 medium red onions, diced small
2 tsp dried oregano
6 medium-large vine ripened tomatoes, diced small
200g ricotta cheese (one standard size pot)

Filling Ingredients
170g pancetta, diced very small
2 tbsp olive oil
200g purple sprouting broccoli, cut into 1-2 inch pieces
500g chicken breast, cut into 1.5 inch chunks
4 cloves of garlic, roughly chopped
3 tbsp lemon thyme leaves, freshly pulled from the sprigs
3 tbsp parmesan, finely grated
300g mozzarella, grated

Pizza Dough Method
In a jug or bowl mix the water, olive oil, sugar and yeast well and set to one side for a few minutes to 'come alive' while you place the sifted flour into a bowl and make a well in the centre. Pour the yeasty mixture into the well and stir together with a fork gradually incorporating the flour. When it starts to come together place the dough onto a clean and floured surface and knead it until you have a springy, smooth dough - this should only take a minute or so. Place this into a floured bowl, sprinkle the top of the dough ball with more flour and cover with a damp clean tea towel. Set this aside in a warmish place to rise for about an hour, it will pretty much double in size.

Pizza Sauce Method
Preheat the oven to 200 C / 400 F.

Heat the olive oil in a deep non stick pan and add the diced onions. Cook for 2-3 minutes and then sprinkle over the dried oregano. Cook for another 2-3 minutes, add the diced tomatoes and stir well. Cook on medium high heat for about 10 minutes until the tomatoes have melted down into mush and you have a fairly thick sauce. Turn off the heat and leave to cool for 5 minutes before mixing in the ricotta cheese. Leave this off the heat to cool while you roast your fillings.

Filling Method
Place all the ingredients into a roasting tray and mix around so everything is coated with the oil, then cook in the preheated oven for 20 minutes, stirring halfway through the cooking time.

Remove from the oven and leave to cool for ten minutes. Pour onto a chopping board and dice everything down into roughly 1cm chunks, cover and leave to cool completely.

Building The Calzone
Remove your risen dough from it's bowl and knead again on a clean floured surface. Give it some welly and punch it about a bit this time to get the elasticity going, then cut into either two or four chunks depending on how many calzone you are making.

Roll the chunks of dough out into rough circles that are about half a cm thick. Place one onto a baking sheet and slather it with a good layer of the creamy tomato sauce. Sprinkle over some of the parmesan and then pile up some of your filling covering only one half of the base. Cover that with a good layer of grated mozzarella and then fold the non-topped side over the top of the fillings and press down around the edges to seal it closed.

Repeat until you have all your calzones made and then bake in the still preheated oven for 20-25 minutes until they are crispy and just starting to go golden. If you have any of the sauce left, heat it up gently in a pan and serve alongside the calzones to dip your crispy crust edges into.

Garlic and Lemon Thyme Roasted Chicken and Purple Sprouting Broccoli Calzone

Notes
Please do use purple sprouting broccoli if you can get it, it has a more pronounced flavour and less water content than the bog standard green stuff.

The creamy tomato and ricotta sauce in this recipe is a good staple to have in your repertoire - use it as a sauce for pasta, pour it over chicken breasts and top with cheese and breadcrumbs before baking or even use it cold in a sandwich as an extra spreading of delicious moisture.

I know it seems like a lot of effort, but homemade pizzas are always so much better than any take away or premade thing you could buy. Even if you only make them once a year as a treat you should give these babies a go.

Monday, 26 July 2010

Nancy's Best Macaroni and Cheese

Nancy's Best Macaroni and Cheese - The Inky Kitchen

After a work week like last week, I really needed a big plate full of comfort food. Being left to cover three peoples jobs is definitely not fun, and definitely not something I will be repeating after this second week of it is over. Part of me wishes that food didn't make me feel better - I would be a hell of a lot slimmer if it didn't - but sadly I don't earn enough to go on shopping sprees to lift my spirits. Until I win the lottery, I will soothe my soul with delicious but not so nutricious dinners.

This recipe is by far one of the best comforting meals I can think of and involves three of the archetypal warm you up from the inside ingredients - cheese, cream and pasta. Not for the weight watching (or the faint hearted some may say), this oven baked pot of starchy goodness was apparently made popular in the Western world by Thomas Jefferson who brought it back to Virginia, USA after his adventures in Italy, the land of wheaty cheesy goodness. Pasta? Pizza? Cannolis? Boy does that country know how to eat.

Nancy's Best Macaroni and Cheese - The Inky Kitchen
Onions cooking with garlic and sage / Milk infusing with bay leaf and nutmeg


So you can imagine my surprise when Pete let slip that he had NEVER EATEN MACARONI CHEESE? What? Is that possible? Not even the crappy boxed stuff or lame pre-packed ready meals? Of course I had to make him try it, and start with the best version possible - baptism by fire I say. My guy is a big time cheese lover, and emmental is one of his favourites so I added that to my recipe and it was a really good choice adding a slightly sharper edge to the rich creamy sauce.

Nancy's Best Macaroni and Cheese - The Inky Kitchen
Cooking roux / Finished white sauce

You could really use any cheese combination you like, but I wouldn't advise using any more mozzarella than I have here - I think if you upped the amount below it would be too stringy to mix thoroughly through the macaroni and onions. As you can see below my sauce was very elastic but still viscous enough to coat everything well. A sprinkling of parmesan over the top would add another layer of sharpness to cut through the cream.

Nancy's Best Macaroni and Cheese - The Inky Kitchen
Finished cheese sauce / Macaroni, onions and sauce mixed to perfection

Do try to get panko for the topping too, it really is far better than regular breadcrumbs and gives a beautiful crunch to the burnished exterior.

I really would not advise this as a regular meal, one serving probably contains a whole days worth of calories and fat and I don't want to be held responsible for the first death by cheese clogged artories...


Nancy's Best Macaroni and Cheese - The Inky Kitchen
Just going into the oven / Just out of the oven

Nancy's Best Macaroni and Cheese
Makes 8 servings - this can be halved or the leftovers can be frozen after they have cooled for up to 1 month

Ingredients
1 tbsp olive oil
1 large white onion, diced
5-6 sage leaves, torn in half
1 large garlic clove, cut in two
500ml milk
2 bay leaves
pinch of nutmeg
30g plain flour
pinch of salt
pinch of ground black pepper
250g grated mozzarella
250g grated mature cheddar
200g grated emmental
250g macaroni
2 cups panko (or regular) breadcrumbs

Method
Preheat the oven to 190 C / 375 F and butter either 2 medium or 1 large deep sided oven pan. Put these to one side out of your way.

Fry the diced onion, garlic halves and torn sage over medium heat until they are soft and caramelised. Remove the garlic halves and sage leaves and set aside - this can be done in advance and refrigerated if needed.

Warm the milk over low heat with the broken bay leaves and nutmeg until it comes to a simmer, then turn off the heat and remove the bay leaves . Melt the butter in another deep sided pan over medium heat and when it starts to bubble mix in the flour, salt and pepper, then cook for 1 minute. Whisk in the hot milk in 4 parts - it may seize up at first but keep whisking and when all the milk is added you should have a smooth sauce. Keep cooking this mixture, stirring often, until it bubbles and thickens - this should take around 10-12 minutes. While this is cooking put the pasta on to boil for aroudn 8 minutes - you want it to be al dente as it will soften more in the oven.

Take the pan off the heat and thoroughly mix in the cheeses, leaving a little of each to use as topping, and set aside. Drain your al dente macaroni and rinse it in cold water to get most the starch off. Add to the cheese sauce with the onions you cooked earlier and stir through so everything is well combined.

Pour into the buttered oven pan(s) and top with the remaining cheese and a good layer of panko breadcrumbs. Put into the oven and bake for 30-45 minutes until the tops are golden, bubbling and crispy. Serve alongside salad with a balsamic and olive oil dressing and eat your way to high calorie heaven.

Nancy's Best Macaroni and Cheese - The Inky Kitchen

Sunday, 18 July 2010

Sweetcorn and Red Onion Fritters

Sweetcorn and Red Onion Fritters - The Inky Kitchen

I must apologise for my lack of prose recently. I have had a very busy and muddled mind for the last few weeks which I put down to trying to do far more things than I am actually capable of. That last one has been a downfall of mine for years. I find it very very difficult to let people do things for me, this usually ends up with me being rushed off my feet suffering from a stress induced throat infection and then having a minor panic attack at/on/to Pete. Thankfully he now understands my crazy, or so I like to think, and knows that within a few minutes I will again be fine and smiling. Hugs are all I really need, I am a lot softer than my tattooed exterior would lead you to believe.

Hopefully now that I have realised my silliness and am trying to lighten my creative load I will be able to explain my inspirations for the things I cook and blog. I don't like to just get straight on with a recipe with no notes on why it is so delicious or significant in my life. I am the same with cookery books - this is probably why I love Nigella so much - she gives little anecdotes and cooking tips before each of her recipes. Nigella forever <3

These fritters were in fact a disaster the first time I tried to make them. My batter was much too runny and they ended up with raw centres. I was cooking them far too hot, charring the outside but leaving a gooey inner. Huge fail. This time however I put a little more research and thought into the batter recipe and they worked wonderfully. Since I made them three days ago I have had no less than eight seperate cravings for them. Discs of crispy fried corny perfection is what they may from now on be know as.

Sweetcorn and Red Onion Fritters - The Inky Kitchen

Sweetcorn and Red Onion Fritters
Makes 12

Ingredients
100g self-raising flour
1/2 tsp smoked paprika
1/2 tsp chilli flakes or cayenne pepper
1/4 tsp white pepper
1/4 tsp salt
150ml milk
2 eggs, separated
2 tbsp parsley, finely chopped
250g sweetcorn kernels - I used a drained tin full
1 medium red onion, diced very small
sunflower oil for frying

Method
Place the flour, paprika, cayenne pepper, salt and white pepper into a bowl and mix together. Whisk the milk, egg yolks and parsley in a jug and pout into the flour mixture, beating until well combined.

Whisk the egg whites until they form soft peaks and then fold into the batter along with the sweetcorn kernels and diced red pepper. Leave to one side while you heat a few tablespoons of oil in a frying pan.

Fry heaped tablespoons of the mixture in batches over a medium heat for around 3-4 minutes on the first side, then flipping and cooking for a further 2-3 minutes. Place on a plate under foil and put into a low oven so they stay hot while you cook the rest of the fritters.

Serve warm with a little mayonnaise or salsa. You can freeze any leftovers for re-heating at a later date, just make sure you wrap them well in foil or plastic wrap.


Sweetcorn and Red Onion Fritters - The Inky Kitchen

Tuesday, 6 July 2010

Sweet Chilli and Roasted Butternut Squash Salad

Sweet Chilli and Butternut Squash Salad

Ladies and gents, this has been a pretty crazy long weekend. I spent Thursday night and most of Friday baking up over 100 cupcakes to both fulfil a few orders and take to Groby Family Fun Day for my first stall with Nancy's Sweet Treat Boutique. Believe me when I say that pretty much everything in our kitchen was coated in a fine layer of icing sugar by the end of it!

The resulting evening cleaning session was really worth it though as I sold out within an hour and a half of the fair opening and got lots of interest for custom orders. It really boosted my cupcaking confidence as this was my first fair and had been pretty sure I'd be taking quite a few cakes home - I guess now I know for next time to make even more! Here are some that sold the quickest - vanilla cupcakes baked into wafer cones and frosted to look like cool tasty ice creams!

Vanilla Ice Cream Cone Cupcakes - www.sweet-treat-boutique.co.uk

Needless to say I was bushed by the time we got home after the fair and cooking was the last thing on my mind, so what did I do? ...I made meatloaf for dinner. I guess you just can't keep me out of the kitchen! Minimal cooking was done on Sunday however but by Monday morning my mind was right back in the refrigerator.

A butternut squash had been purchased and so I was trying to think of something a little different to our usual squash risotto with cashew nuts and red wine that was also healthy and relatively low in fat - it is one of my best friends' weddings on the 17th and I have a gorgeous dress that I have to look fabulous in. So what is a healthy dinner? Why salas of course! No boring cucumber and iceberg and unripe tomato disasters here though - nice hot roasted butternut squash chunks over a lettuce, bean and onion base with some sesame seeds for crunch and a dose of heat with a sweet chilli dressing (which would be fabulous over pasta too I think).

Sweet Chilli and Butternut Squash Salad

Sweet Chilli and Roasted Butternut Squash Salad
Serves 2 for a main course of 4 for a starter

Salad Ingredients
600-700g butternut squash, peeled, de-seeded and diced into 1-2cm cubes
1 clove garlic, crushed
1-2 tsp olive oil
2 little gem lettuces, sliced any way you like
half a red onion, sliced very thinly and doused with a little lemon juice
400g tin flageolet beans, drained and rinsed (265g drained weight)
1 stick of celery cut into half cm chunks
3 tbsp sesame seeds

Dressing Ingredients (this will make more than you need, you can just refridgerate the rest for up to a week)
1 tbsp olive oil
1/2 tbsp sesame oil
1 tbsp sweet chilli sauce
1 tbsp rice vinegar
1 tbsp cider vinegar
1 tbsp soy sauce
1 tbsp mirin / rice wine (optional)
1 tsp brown sugar
1 tsp salt
1 tsp freshly ground black pepper

Method
Spread the butternut squash onto a baking tray in an even layer and cover with the olive oil and crushed garlic, cook in a preheated oven on high for 25-30 minutes until softened and going slightly caramelised and crispy.

While the squash is cooking prepare all the other ingredients but the sesame seeds and divide between the two bowls. Next mix all the dressing ingredients well and pour about a quarter over each bowl of salad, then toss to coat everything.

When the squash is cooked divide it between the two salad bowls and then sprinkle over the sesame seeds.


Sunday, 13 June 2010

Slow Cooker Pulled Pork with Spicey Honey Rum Barbecue Sauce

Slow Cooker Pulled Pork - The Inky Kitchen

I love Southern American cooking and music and barbecue is one of the quintessential southern tastes, they take it to almost fanatical lengths with many hugely popular barbecue competitions and restaurants across the country. Over here in the UK we seem to be lacking them - I have heard of one London based place but that's about it, so to get my fix I have to do it home made. Having no garden makes this a little difficult but lately I've seen several recipes floating around for indoor cooked bbq style food.

One recipe I have seen a lot of but never actually tried is pulled pork - slow cooked pork butt/shoulder that becomes so tender you can literally ease it into shreds with two forks. This is usually made in a smoker on the barbecue but can be done in a slow cooker to great effect - I confess I don't actually own one, I've never seen a slow cooker recipe I've ever wanted to make before, so I borrowed one from Pete's mum.

Slow Cooker Pulled Pork - The Inky Kitchen

The pork came out beautifully, I had a 1.5kg piece of pork shoulder which I but into three and cooked for 5 hours on high. When the timer went I grabbed two forks and tried to pull out a piece but it literally fell apart as I tried - perfectly succulent and tender! I probably could have squeezed another 1.5kg in the slow cooker I had, but then I recon the cooking time would have been 8 or 9 hours at least. My piece made enough pork to fill 8 bread rolls generously - I could only manage to eat one roll it was so filling!

This would be really great to have as part of a bbq buffet, and as you do it in the slow cooker it doesn't take up any more room on the grill. It is sure to impress, especially with homemade honey rum barbecue sauce - I think I'm going to have to bottle up a supply so we never have to buy any again!


Served up in some tasty seeded buns with a good dollop of creamy coleslaw this is a perfect meal - remember to put out a bowl of extra sauce, people are sure to want some! (It's great on chips!)

Smoked Paprika and Honey Rum

Slow Cooker Pulled Pork with Spicey Honey Rum Barbecue Sauce
Makes 8 generously filled rolls

Pulled Pork Ingredients
1.5kg pork shoulder/butt

25g dark muscovado sugar
2 tbsp maldon salt
3/4 tbsp garlic granules
1/2 tbsp ground black pepper
1 heaped tsp smoked paprika
1 tsp dried oregano
1 tsp cayenne pepper
1 tsp coarse grain mustard
1/2 tsp worcestershire sauce
1/2 tsp maggi liquid seasoning / liquid smoke
1/4 cup red wine vinegar
1/4 cup cider vinegar

2 medium onions, sliced into think rings
2 cloves of garlic, roughly chopped

Spicey Honey Rum Barbecue Sauce Ingredients
250ml honey rum
250ml tomato ketchup (low sugar if possible)
60g dark muscovado sugar
60ml cider vinegar
1 tbsp lemon juice
1 tbsp balsamic vinegar
1 tbsp light soy sauce
1 tbsp dark soy sauce
1 tbsp maggi liquid seasoning
1 tbsp worcestershire sauce
60ml full fat coca cola
1 tbsp tomato puree
1 tsp english mustard
1 tsp smoked paprika
1/2 tsp cayenne pepper
3 cloves of garlic, minced
20g butter
salt and pepper

Pulled Pork Method

THE NIGHT BEFORE
Cut the pork shoulder into three roughly equal sized pieces and place into a strong ziplock food bag. Mix all the ingredients except the onion and garlic cloves in a bowl and then pour into the bag with the meat. Seal the bag and squish it around a bit so everything gets nicely coated, then place in the fridge to marinate overnight.

ON THE DAY OF SERVING
Remove the marinating pork from the fridge and set to one side. Chop the onions and garlic cloves and place in the bottom of the slow cooker followed by the pieces of pork. Next pour over the marinade from the ziplock bag and place on the slow cookers lid.

Cook on high power for 5 hours, then remove the pieces of meat to a plate or tray and shred with two forks - if the meat does not shred easily it will need more cooking so place it back into the slow cooker for another hour and try shredding again.

Discard the liquid and onions (you do not need these) and place the pork back into the turned off slow cooker until serving time.

Barbecue Sauce Method
Place all ingredients into a saucepan (preferably non-stick) and mix well. Simmer over a medium to low heat for 20-25 minutes until the sauce has thickened, remove and throw away the pieces of onion, and place in a bowl or bottle until needed.

Once simmered down and thickened I had around 400ml of sauce.

To Serve
Pour two thirds of the barbecue sauce over the shredded pork and mix until it is all coated. If needed, cook on medium for a further 15 minutes until heated through.

Place a generous mound of meat into a seeded roll and serve with some good quality creamy coleslaw and a pickle on the side.

Slow Cooker Pulled Pork - The Inky Kitchen

Notes
This recipe is great value as it will feed about 8 people with a piece of meat that costs around £5.00.

We were given our honey rum as a gift last time Pete's parents went on holiday but I have seen it in several off licenses and a few supermarkets. Any nice sweet spirit will do - bourbons are always good in barbecue and I think a dark rum would work well too.

Maggi liquid seasoning is available in many supermarkets in the world foods section, it is a little bottle with a bright yellow lable so you shouldn't miss it.

If you want to save time, you can use a store bought barbecue sauce - we like the Jack Daniels range that you can buy in most supermarkets.


Triple Chocolate and Mocha Cupcakes - Nancy's Sweet Treat Boutique

And this is just a photo of some cupcakes I made for Pete to take in to his colleagues at work. The ones with the red chocolate hearts are triple chocolate and the others are double chocolate mocha.

Sunday, 23 May 2010

Chorizo Risotto Stuffed Squid with Garlic and Cayenne Roasted Harlequin Squash

Squid Stuffed With Chorizo Risotto and Cayenne Roasted Harlequin Squash

As we have had such amazing weather this weekend I only thought it right for todays recipe to include grilling. Unfortunately however we now live in a flat with no balcony or garden so barbecues are out but we have a Foreman grill so I've just used that.

Seafood is always something I associate with summer, especially squid as it's something you usually eat on holiday. I remember walking through Spetses when I was younger with my parents and seeing rows and rows of squid and octopus - ofcourse then I thought that was disgusting but now it conjurs up thoughts of calamari and octopus salad and lots of other delicious dishes!

Chorizo Risotto

The little tubes can be pretty fiddly to fill if they are too small - I ordered the squid with our online shopping order so didn't get to pick which tubes I wanted and consequently got the smallest ones I've ever seen! Stuffing them sure was a task, but worth it. Like I said they were the smallest I've ever seen, the size I usually get would be much easier to fill.

This was also the first time I have tried harlequin squash. I've always eyed them up in the supermarket, bright orange and speckled and striped with green, but seem to end up getting the butternut variety, mainly as it's one of Pete's favourites. This time though I picked up a few, they seem to be the same density as butternut but smell just like pumpkin with the ubiquitus seeds and string to remove before cooking. The skin was harder to peel also, I ended up hacking it off with a knife rather than a peeler!

Squid Stuffed With Chorizo Risotto

Garlic and Cayenne Roasted Harlequin Squash
Serves 2

Ingredients
600g harlequin squash
2 large cloves of garlic, roughly chopped
3 tbsp olive oil
pinch of salt
3/4 tsp cayenne pepper


Method
Preheat the oven to 170 C / 335 F.

Peel the squash, remove the seeds and stringy innards and then but into slices about 1cm wide. Spread over a deep sided baking tray, strew over the chopped garlic, then sprinkle over the oil, salt and cayenne pepper.

Roast for half an hour, tossing halfway through.


*******

Chorizo Risotto Stuffed Squid
Serves 2

Ingredients
2 tbsp olive oil
50g chorizo sausage, diced very small
1 small red onion, diced very small
1 medium clove garlic, finely chopped
6 medium cleaned squid, tentacles diced small
50g arborio rice
2-3 tbsp flat leaf parsley, finely chopped
300ml boiling water - infused with a little saffron if you have it


Method
Fry off the onions, garlic and chorizo in the olive oil for about 3 minutes until the onions are soft and the chorizo has let go some of it's fat. Add the arborio rice, parsley and diced tentacles and fry for a further 3 minutes before adding a quarter of the boiling water. Turn the heat to medium and cook until the water has soaked into the rice. Repeat this step three more times with a quarter of the water each time.

After this taste the rice, it should now be softened. If not, repeat the above steps with 75ml water each time until the rice is cooked through. Remove from the hob and leave to cool for 15 minutes.

Take a clean squid tube and using a teaspoon stuff them with the cooled risotto up to around 1cm from the top of the tube. Take a cocktail stick and push it through the top of the tube at the open end as shown in the pictures above and below to stop the risotto from spilling out.

Grill on a barbecue, indoor grill or grill pan for 3-5 minutes on each side depending on the size of your squid. Don't overcook or you will get very rubbery results!

Serve with the roasted squash and a lemony vinaigretted
salad.

Squid Stuffed With Chorizo Risotto

Is it just me or do they look like strange little slug/bull hybrids? Just me? Ok...

Squid Stuffed With Chorizo Risotto and Cayenne Roasted Harlequin Squash

Pete said this was one of his favourite dinners yet, so I suggest you all try it soon!